File Templates
By using the “File Data loaders” user can create the tables in database and load the data into tables
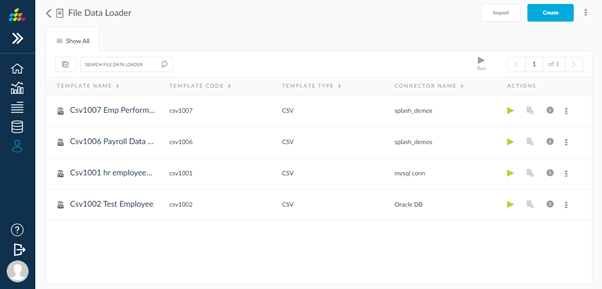
Navigation: Admin --> Setup --> File Data Loader
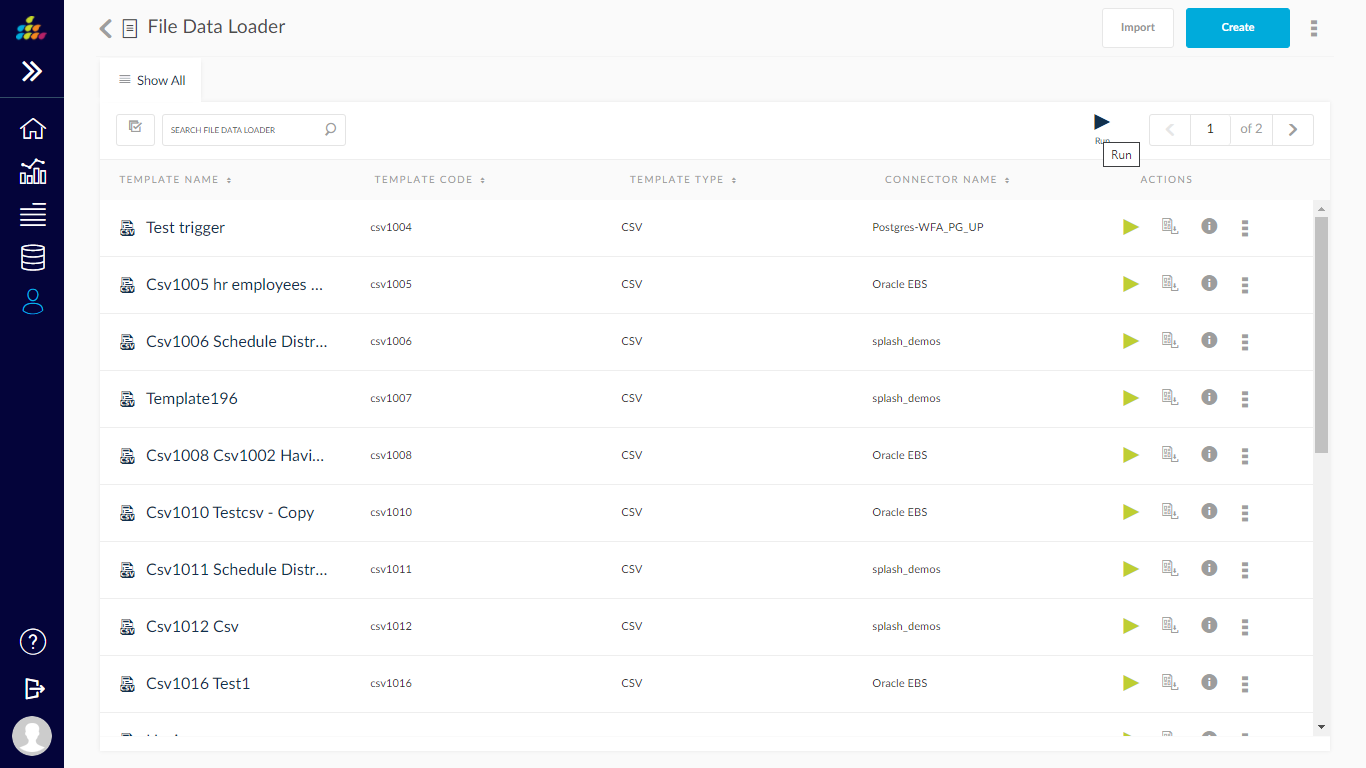
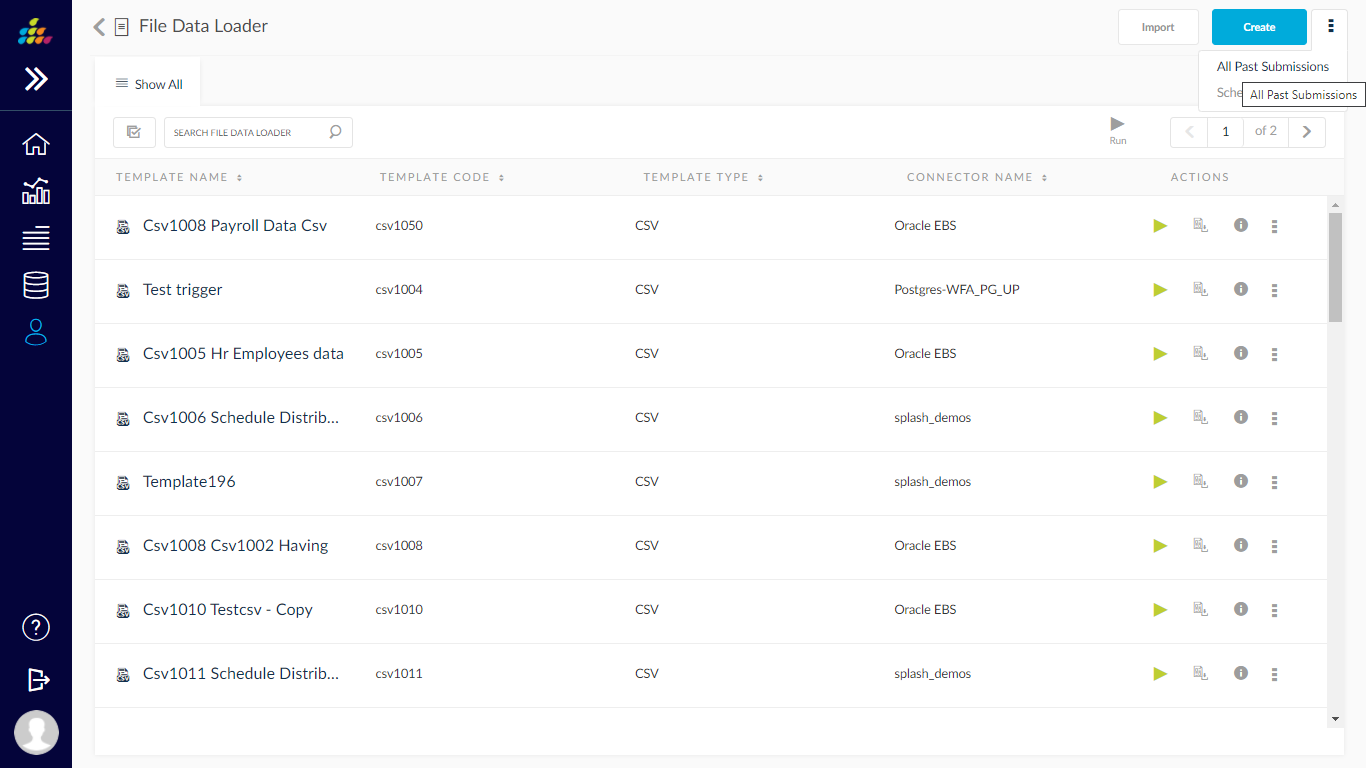
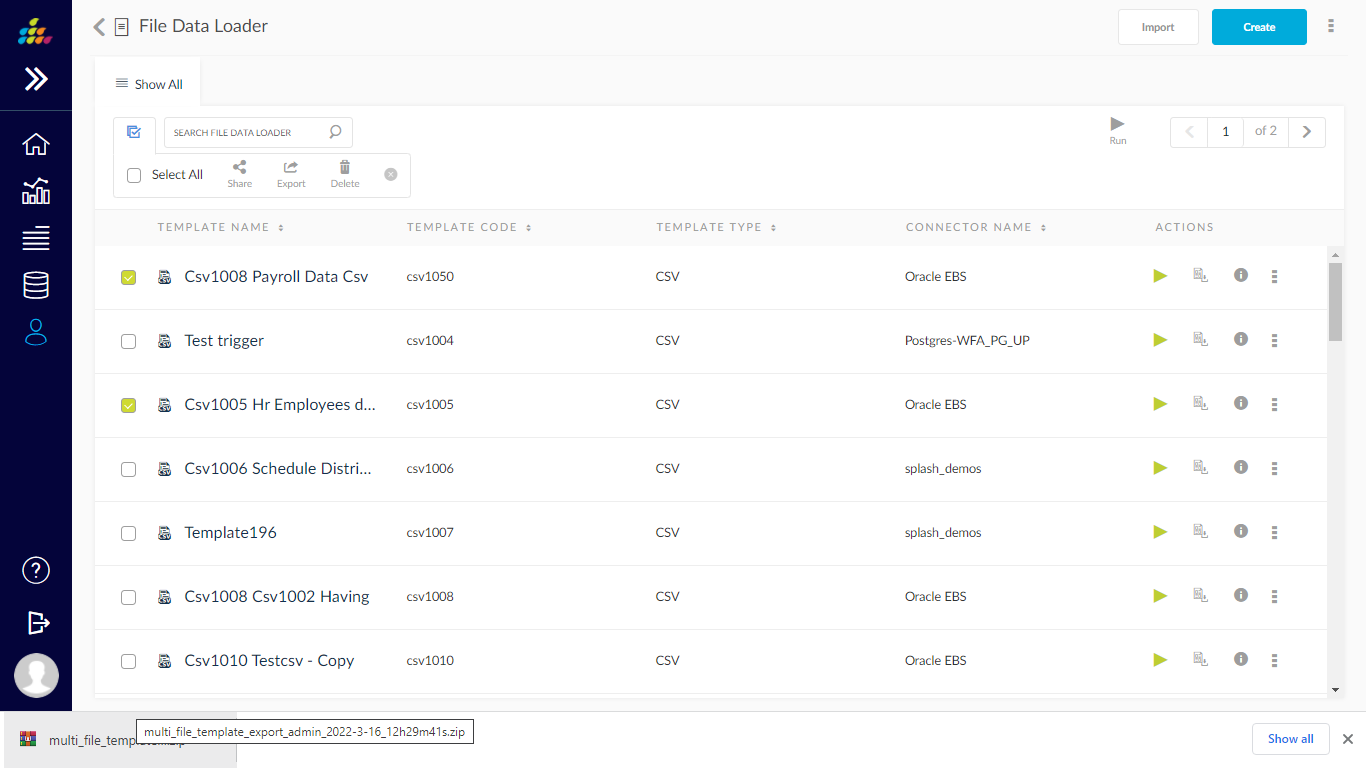
After navigate to this screen user will able to view list of file templates.
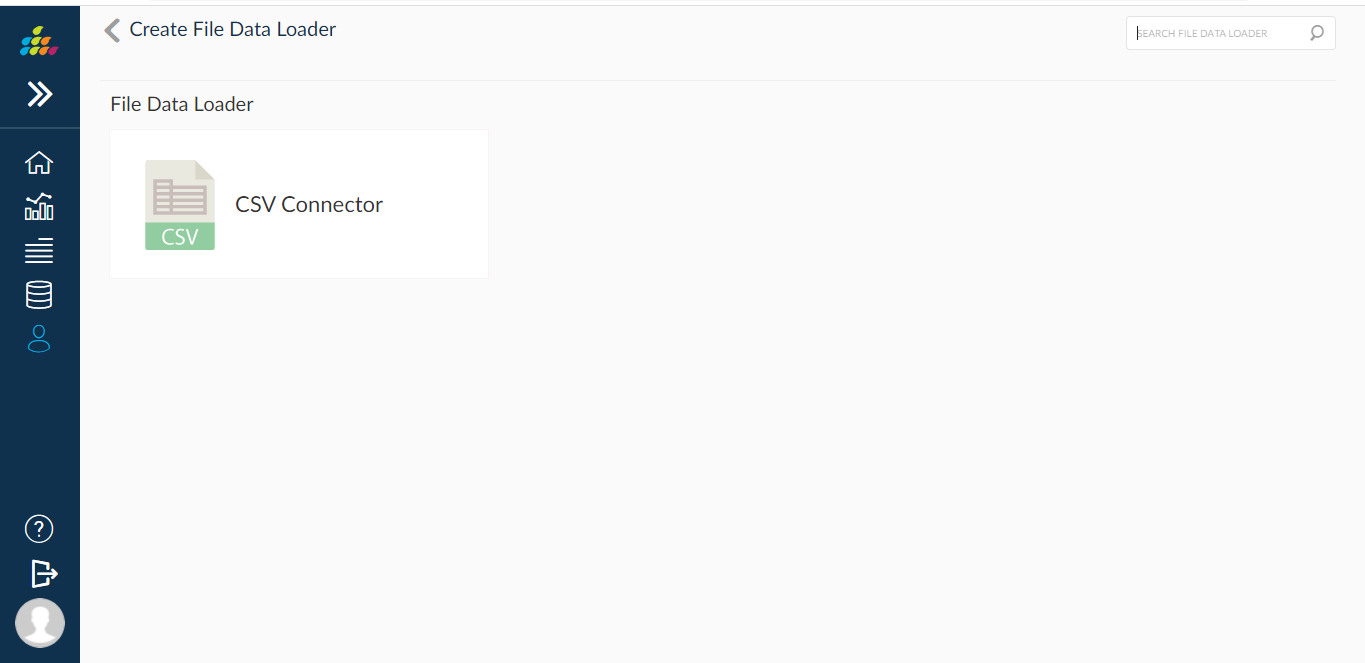
When user click on create button, screen will navigate to ->” Create File Data Loader” screen, here user can select the CSV connector.
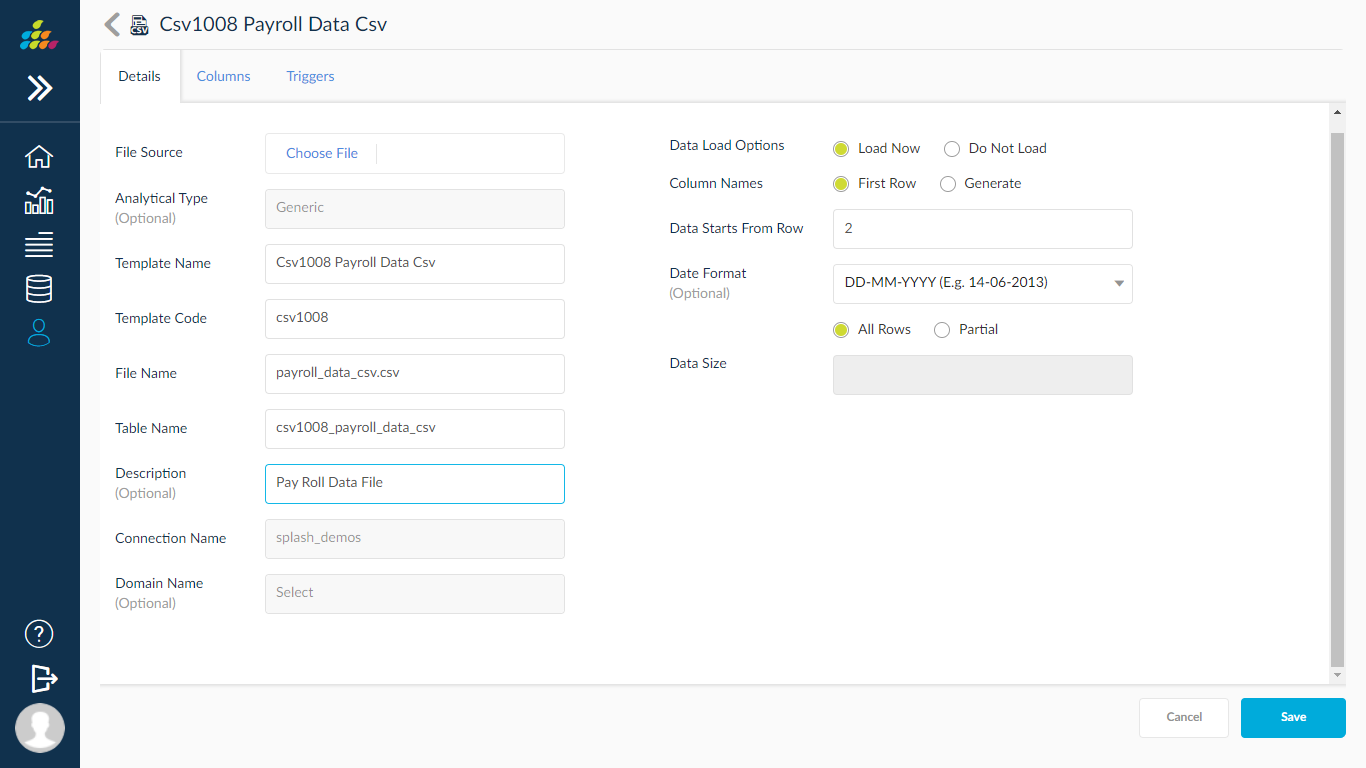
After navigate to the “Create file data loader” screen , user will able to view the details tab.
In Details tab user can view the list of fields
File Source : User can choose the CSV file by using choose file option.
Analytics type :- By default it will auto populate the Generic type, if user want to change analytic type from drop down list.
File Name:- File Name will auto populate based on selected CSV file ,if user want to change the file name instead of auto generate file name, user can change.
Table Name: Table name will auto generate by using “Auto Generate” option, it will generate with combination of template code + file Name.
If user can give the custom table name by choosing custom option.
Description :- User can enter the description of file data loader in input text field.
Connection Name:- User can select the connection name from connection drop down list , based on selected database connection table will created
.
Domain Name : User can select the domain name from drop down , based on selected domain table will created under domain name.
Data Load Options : Data load options has multiple options,
Load Now: When user select the “Load Now” option data will be Load after creation of file template,
Do Not Load: When user select the “Do not Load” option data will not load after creation of File template.
Column Names: Column Names has multiple options
First Row: When user select the “First Row” option column names will read from first row of the CSV file
Generate : When user select the “Generate” option column names will auto generated like Column 1, Column2, Column3 etc…
Data Starts from Row :User can enter the data line number, based on line number entered data will read from CSV file.
Date Format: User can select the “Date format” from drop down , based on selected date format, data will convert and insert to table.
Date Size : Data size has multiple options
All Rows: When User select the “All Rows” all the data from CSV file will be load.
Partial : When user select the “Partial ” option after that ,user can enter data size input text field, based on given size data will be load.
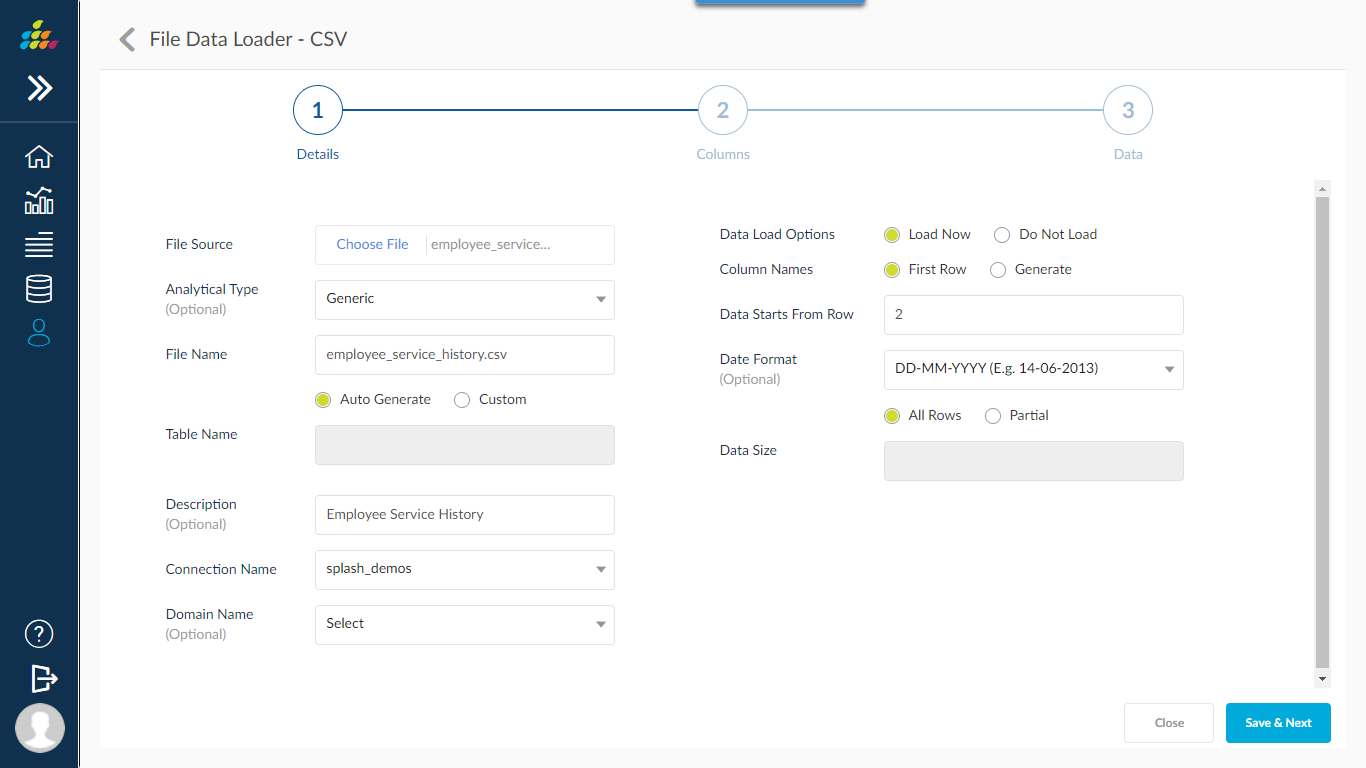
After providing all the details user can click on “Save & Next” button to save the details and screen will navigate to columns tab
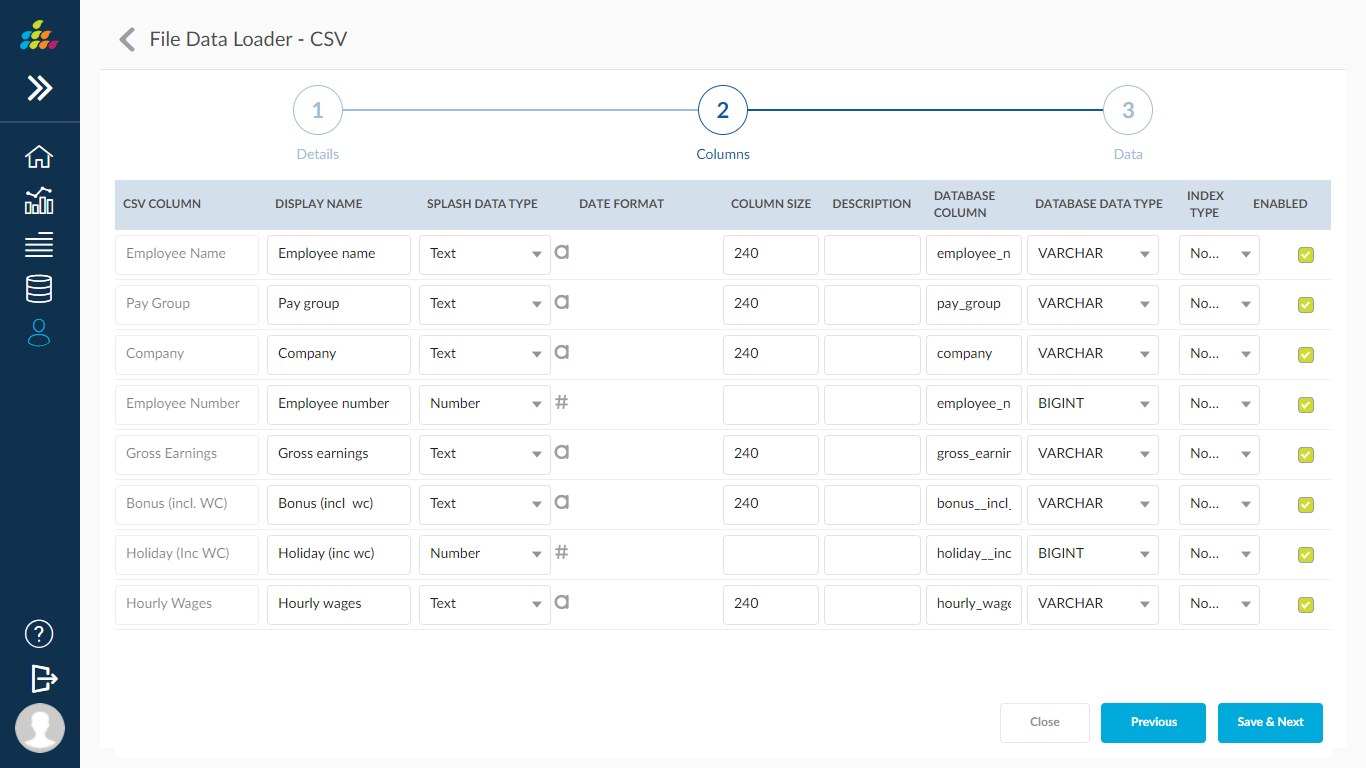
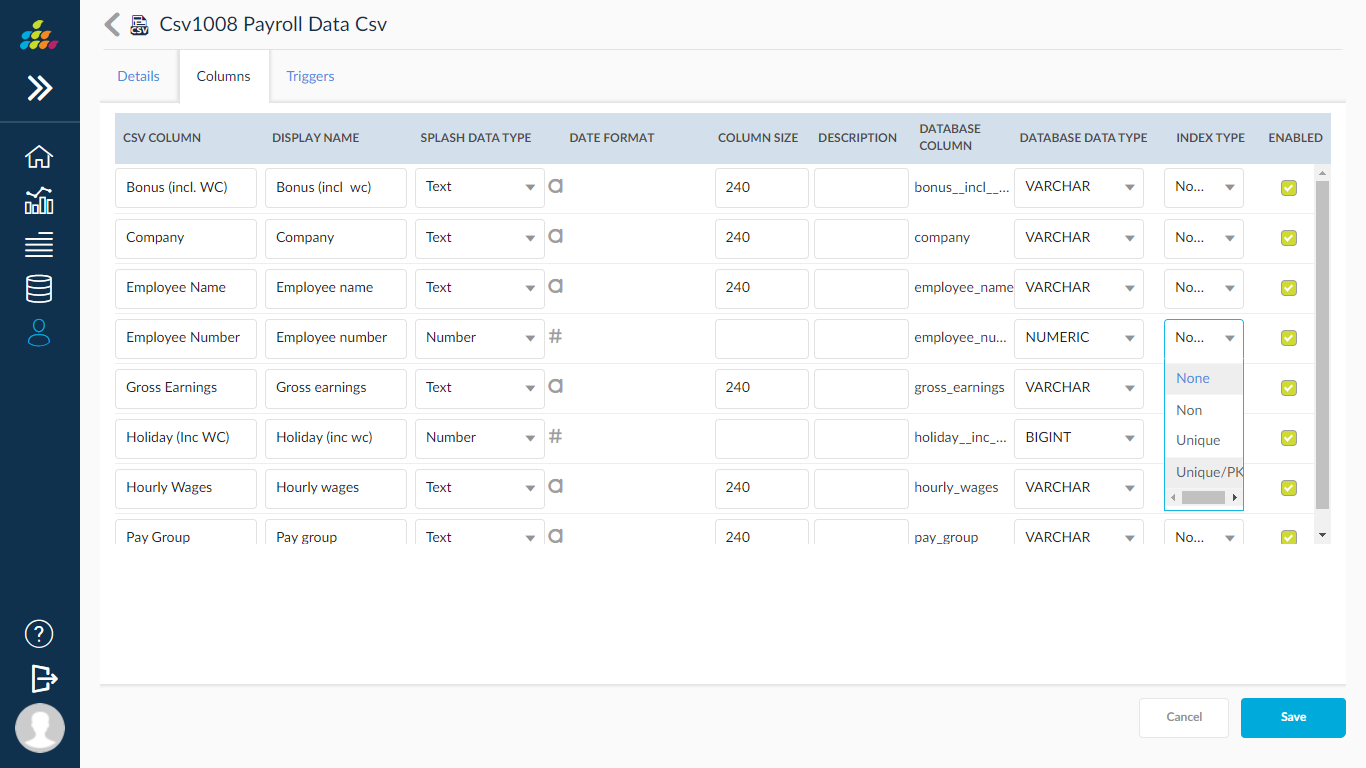
Columns:In Columns tab based on selected CSV file columns will auto populated with data type, here user can change “Display Name”, “Splash Data Type”, “Database Data Type” and “Index Type”
After changes are done user can click on “Save & Next” button to save the details and screen will navigate to “Data” tab.
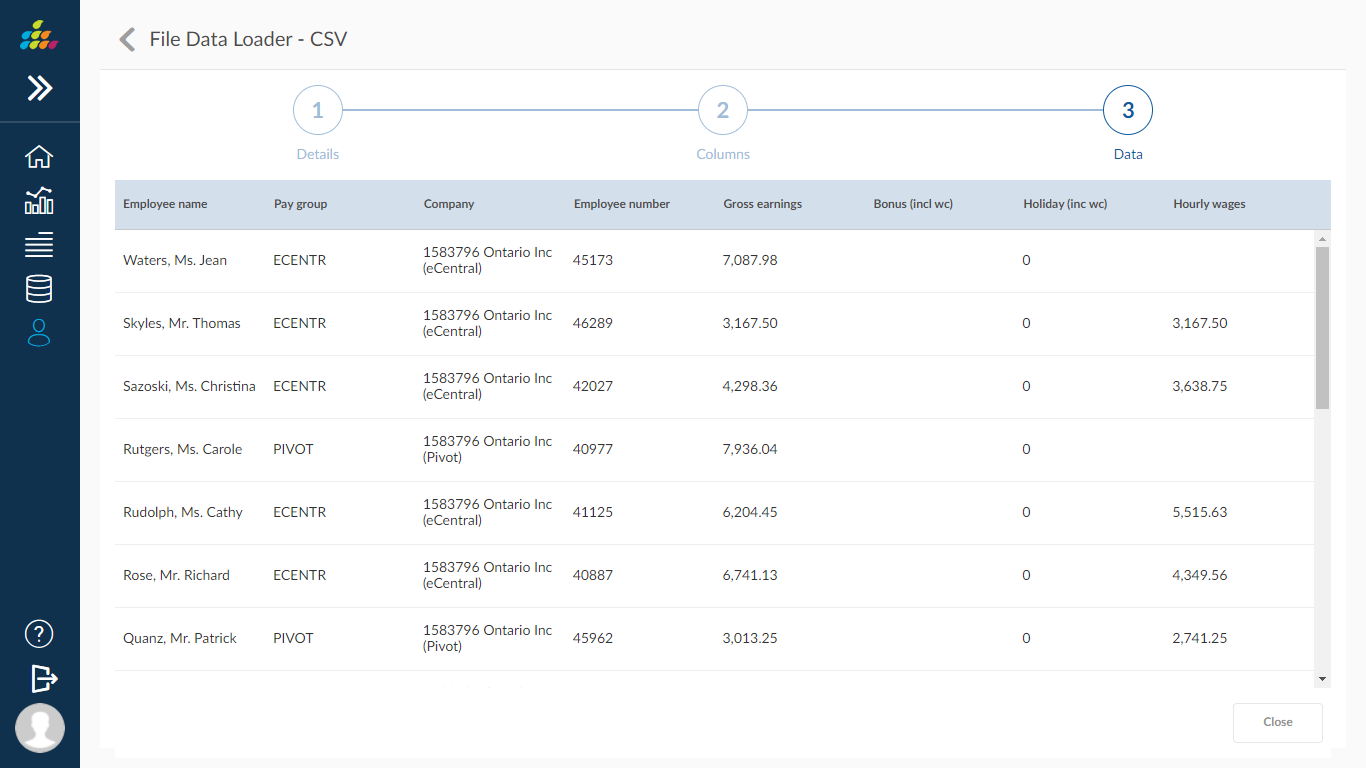
Data: In data tab user can view the CSV file data, after the click on “Close” button to close tabs.
Edit: User can edit the “File data loader “ by click on edit icon from list screen.here user can edit the details which are in editable mode,after changes are done. click on save button to save details.
Index Type: By default, “Index Type” is “None” If user want to change the “Index type” from the drop down list, then click on save button to save the changes.
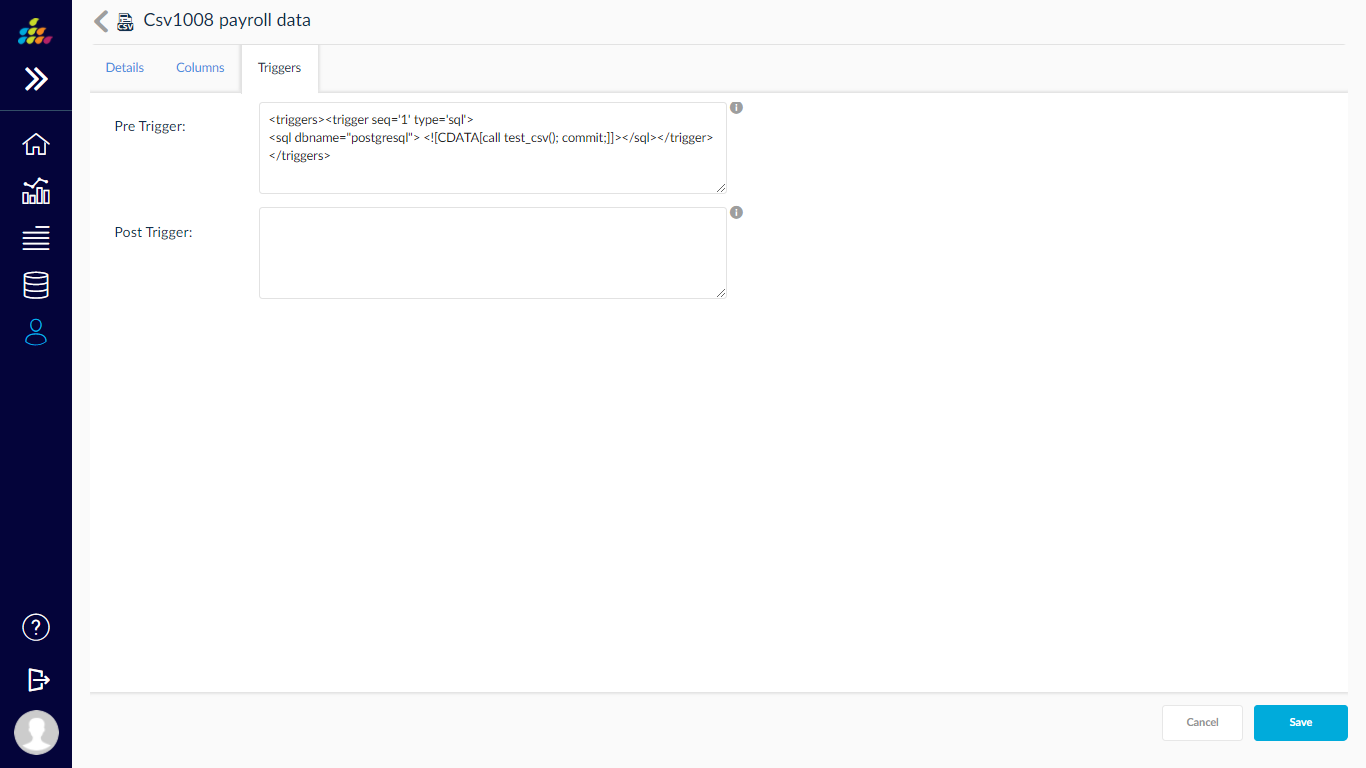
Triggers :- In Trigger tab user can enter “Pre Triggers” , “Post Triggers” logic in XML format.
“Pre Triggers” logic will execute before file template load, “Post Triggers” logic will executes after file template executed.
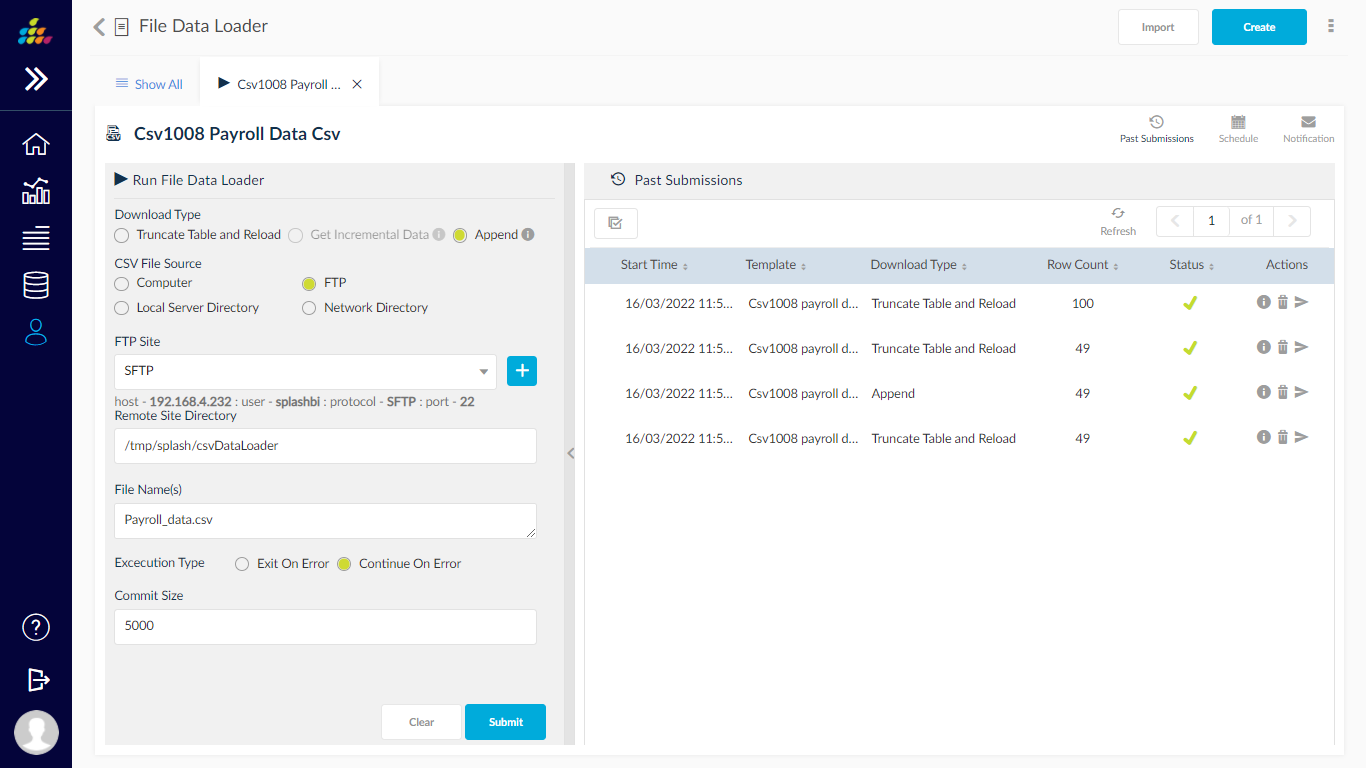
Run: When click on Run button user will navigate to submit screen
Here user can view list of options to submit the process
Download Type: Down Load Type has multiple options
Truncate Table and Reload : When user click on “Truncate Table and Reload”, option all the data in table will truncate and inserted with new data.
Get Incremental Data: When user click on "Get Incremental Data”, option, it will check same data is available or not, if data already exists it will update the data otherwise inserts new data.
Append: -When user click on “Append” option, data will append to existing data. I will not check data is available or not.
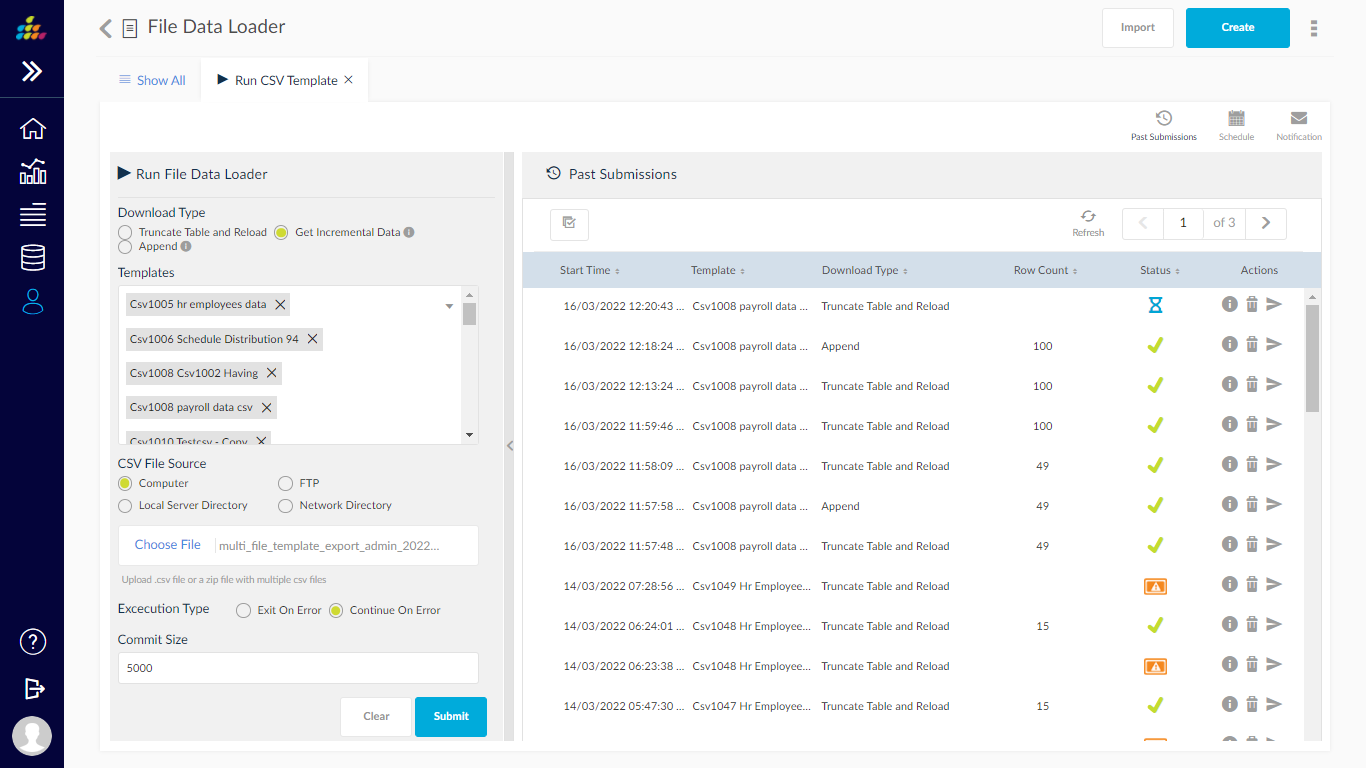
CSV file Source: User can load CSV file from different sources like “Computer”, “FTP”, “Local Server Directory” and “Network Directory”, user can select any one of the source to load data.
Execution Type:Execution type has multiple options are
Exit On Error: - When user select the “Exit On Error” option, while loading data into table process will exit/terminated only when error occurs with junk data.
Continue On Error: - When user select the “Continue On Error” option, it will skip error records/data and inserts/updates the all valid data into database.
Commit Size: - By Default commit size is 5000, if user want to change the commit size, based on entered value data will commit to database.

Mass Run: User can run multiple templates at a time by clicking on mass run option in list screen, after clicking this button user will navigate submit page, here user can select the multiple templates from drop down list.
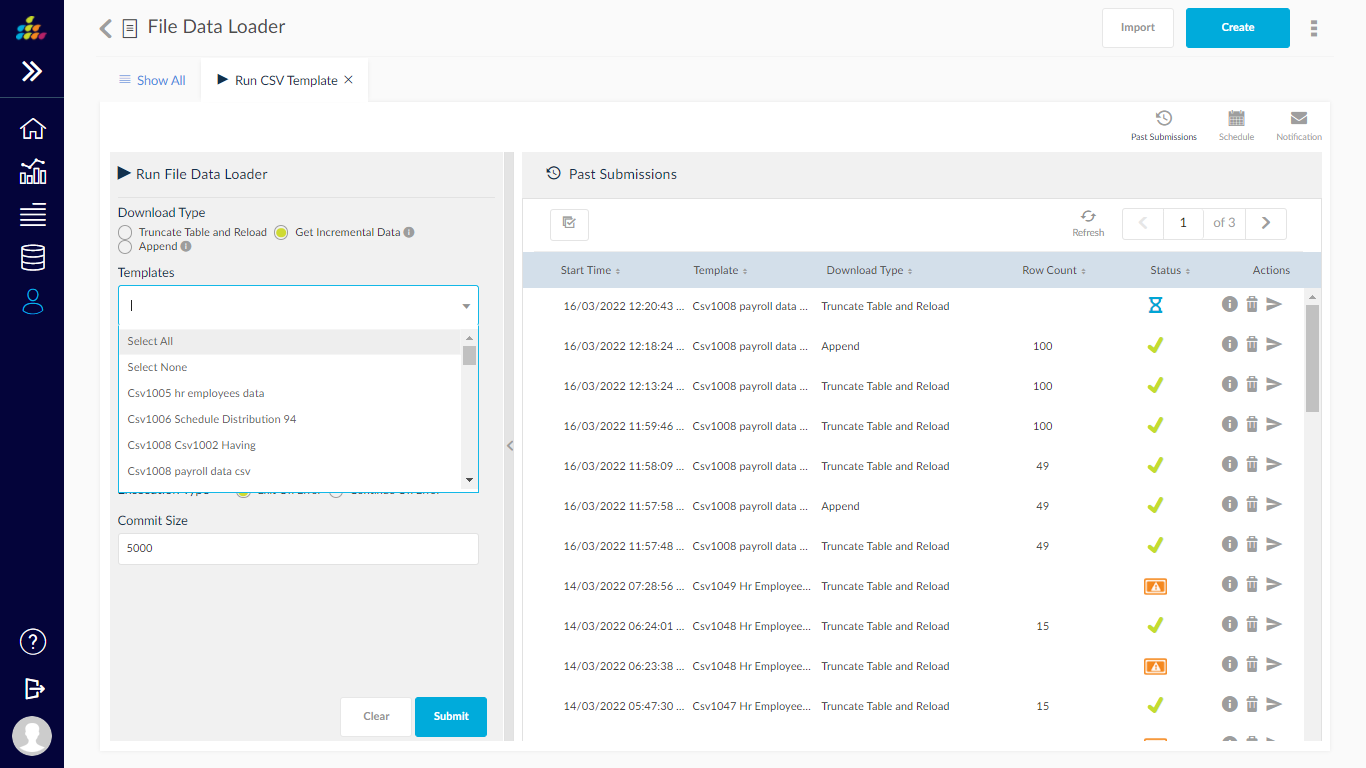
After selecting the multiple templates ,user can click on submit button to submit the process
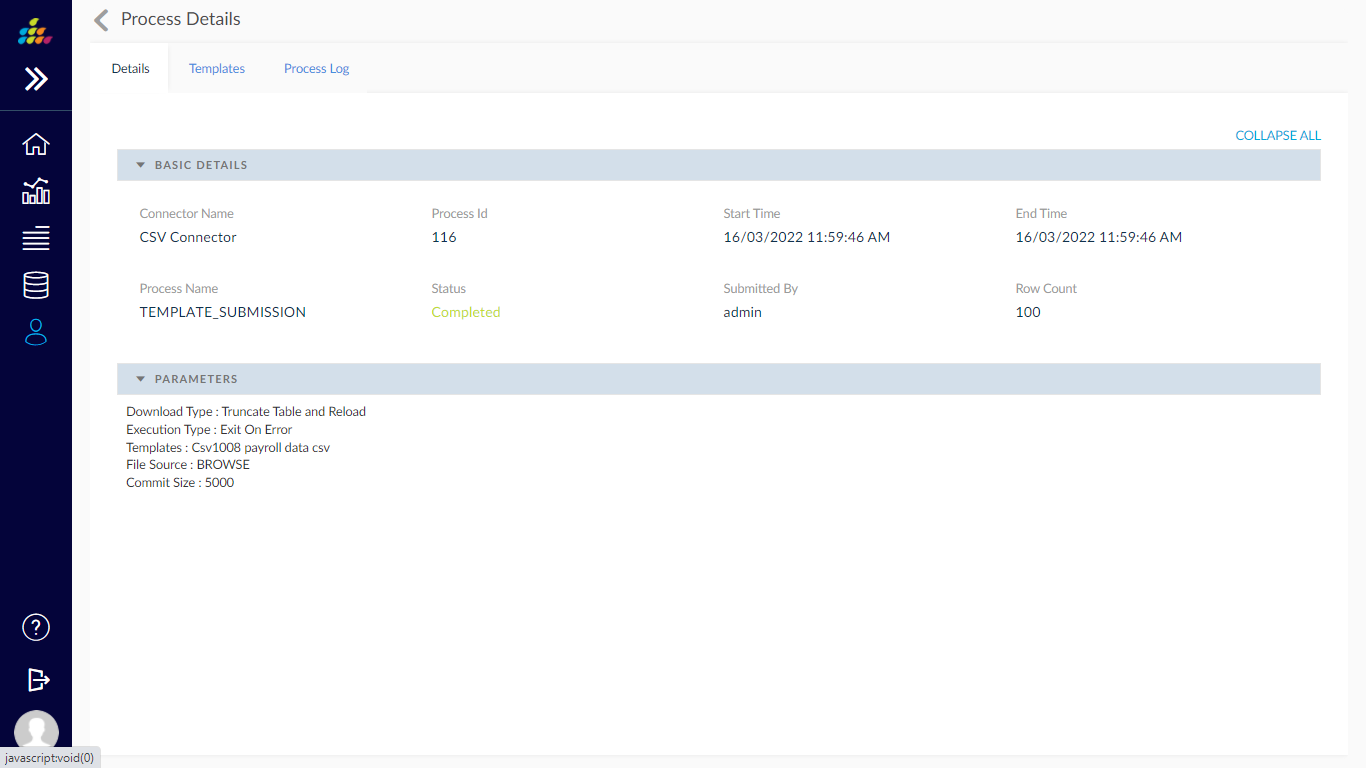
Process Info: User can view the process info by clicking on info icon, after clicking on info icon user will able to view the pop up screen, in pop up screen user can view the “Details”, “Templates” and “Process Log” tabs
Details: In details tab user can view the template process details
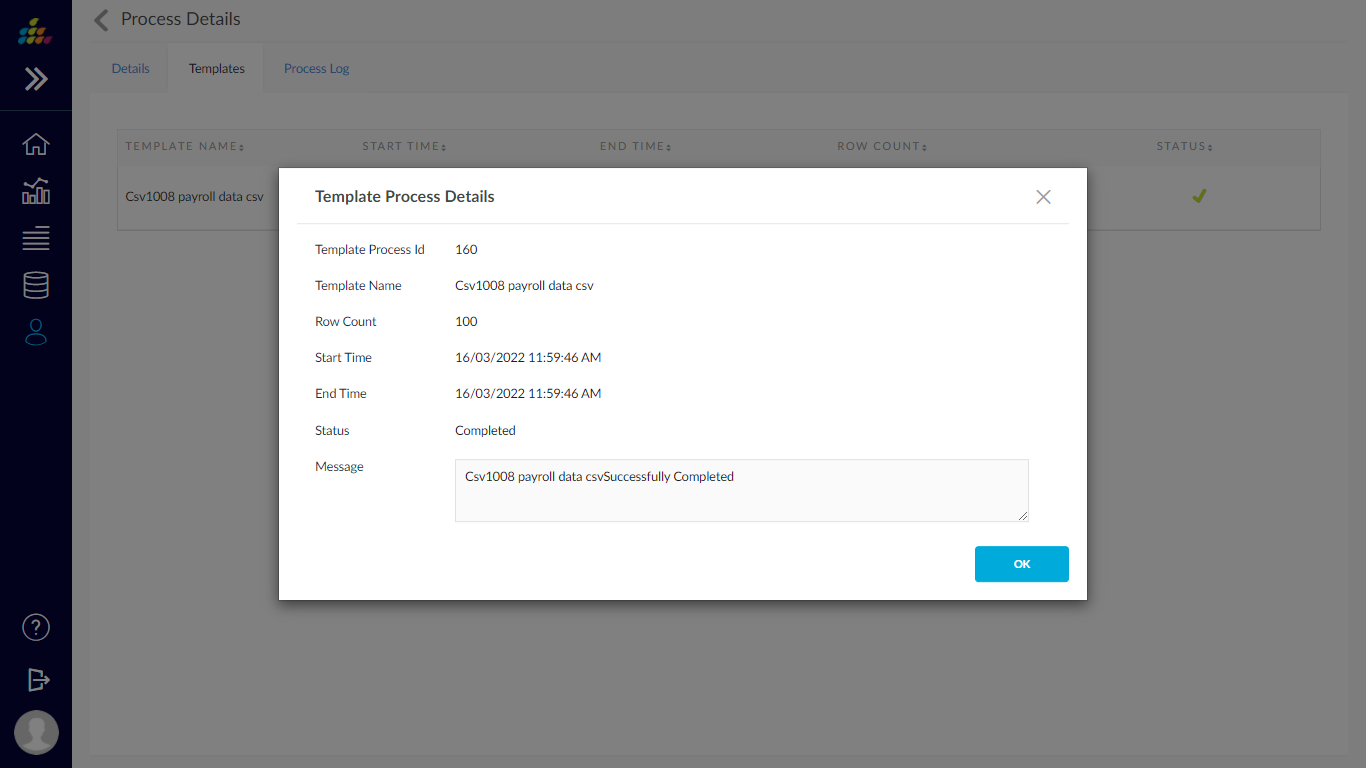
Templates: In process templates tab user can view list of submitted templates with details
When click on Status icon user can able to view the process details
If process status is “Completed” user can able to view the process details with success message
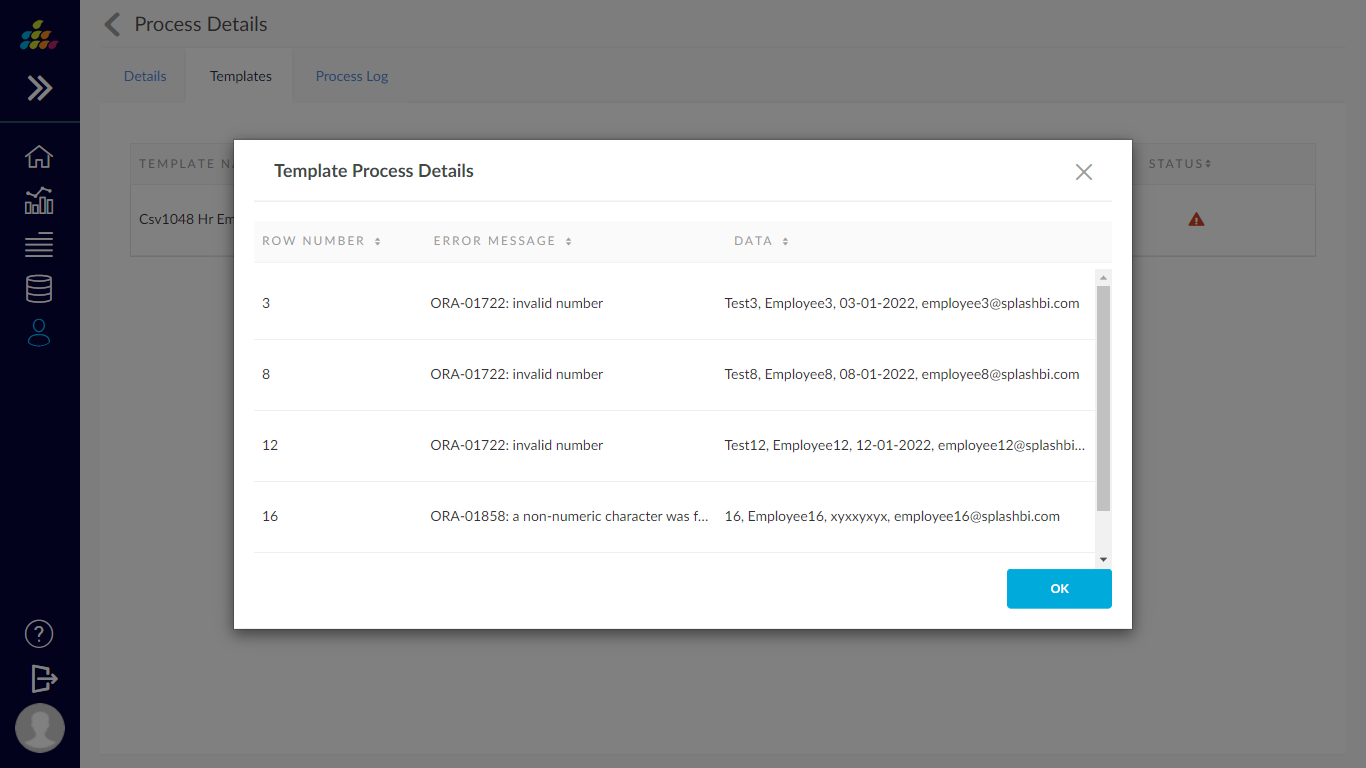
In case of process status is “Error” user can able to view the failed records with “Row Number”, “Error message” and “Data”
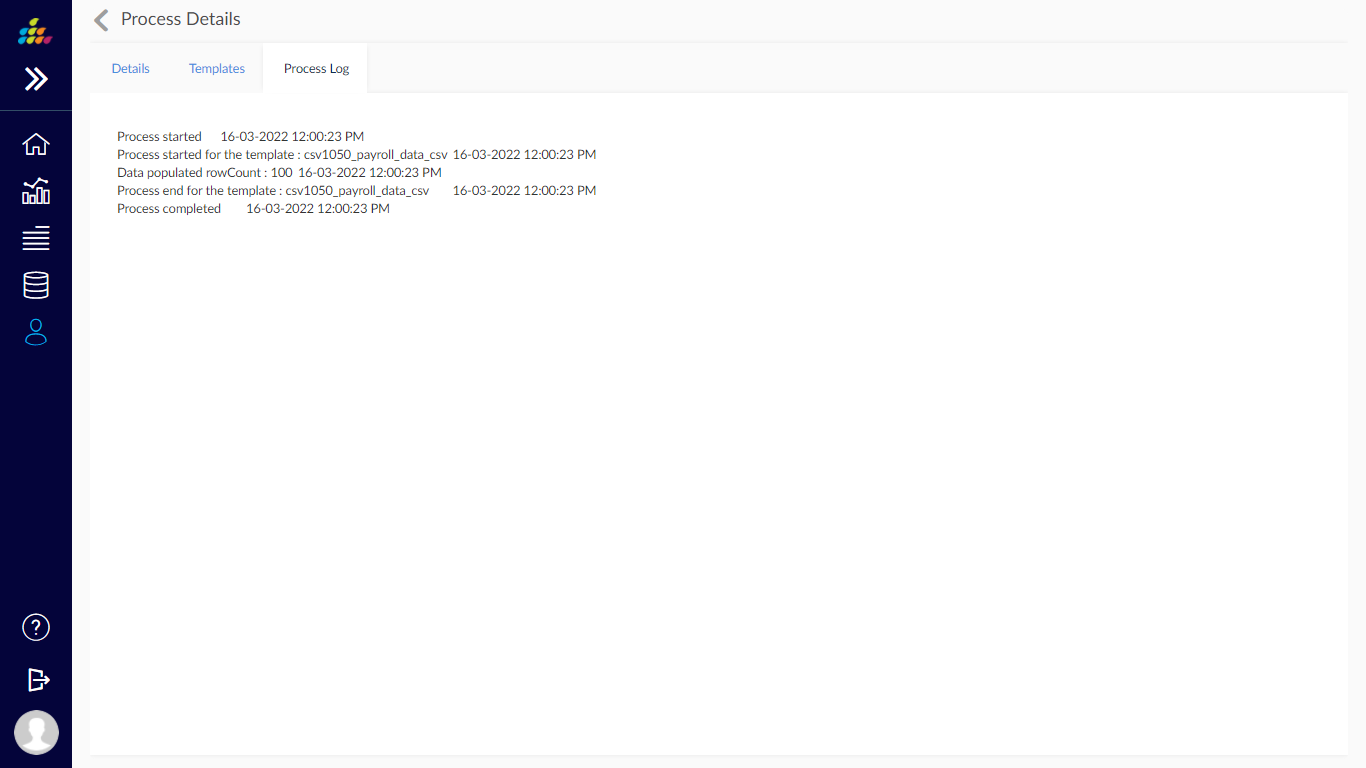
Process Log :In process log tab user can view the log information of the process
Delete Processes:User can delete the processes by clicking delete icon.
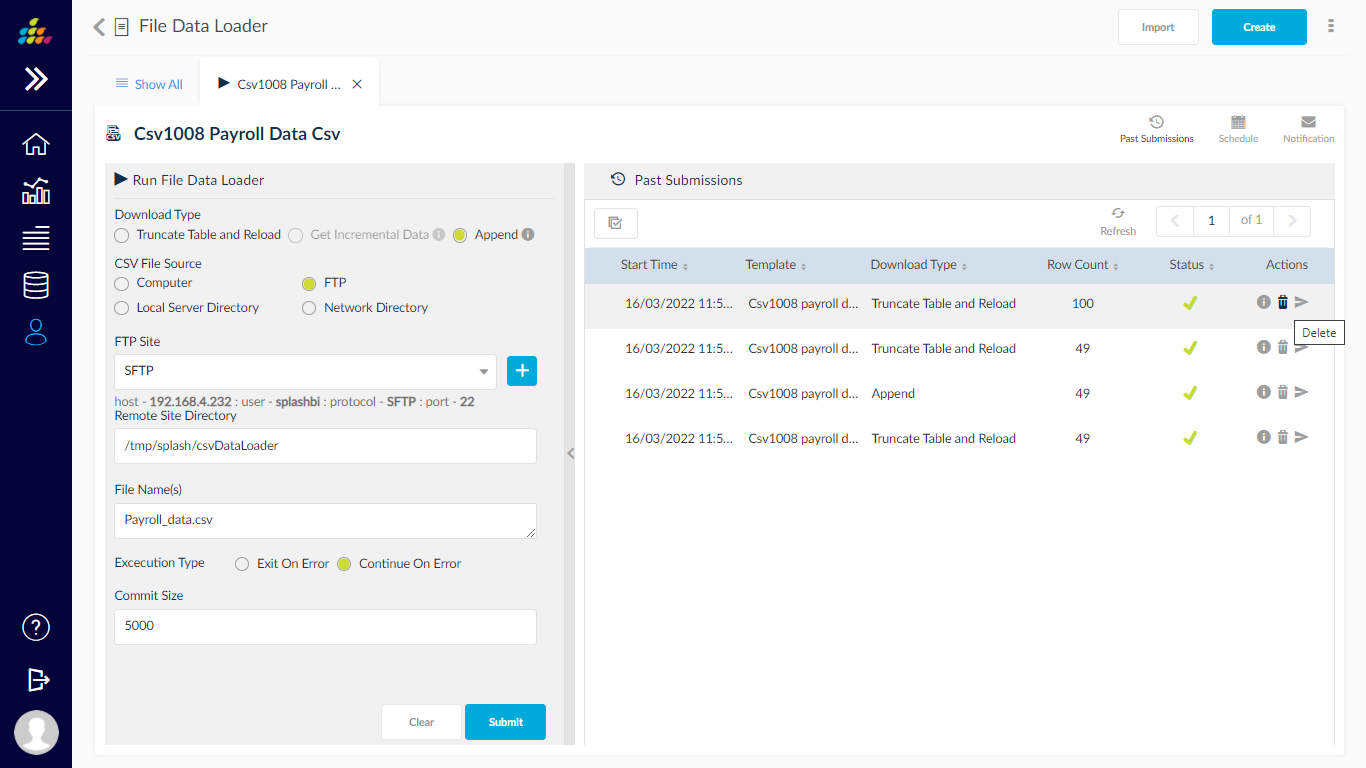
Resubmit Process: User can resubmit the previous submitted process by using this option

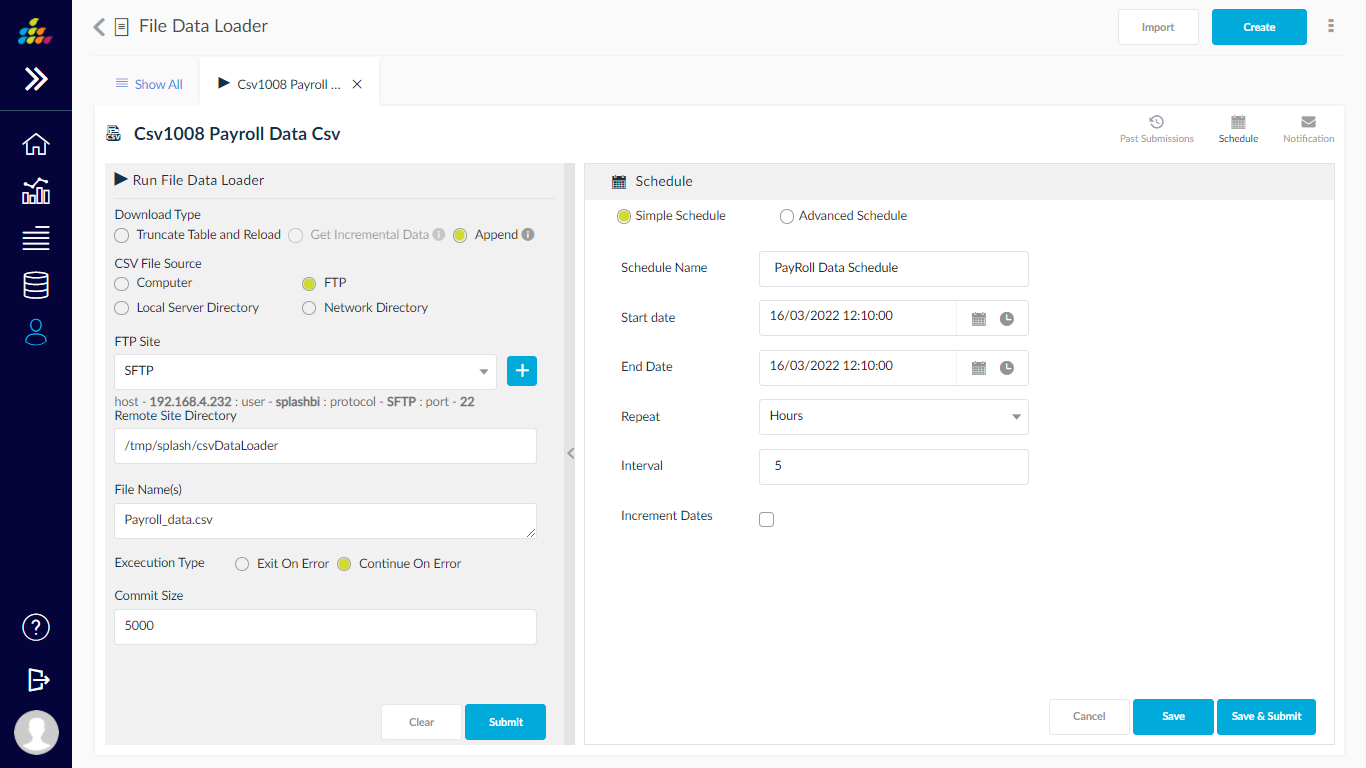
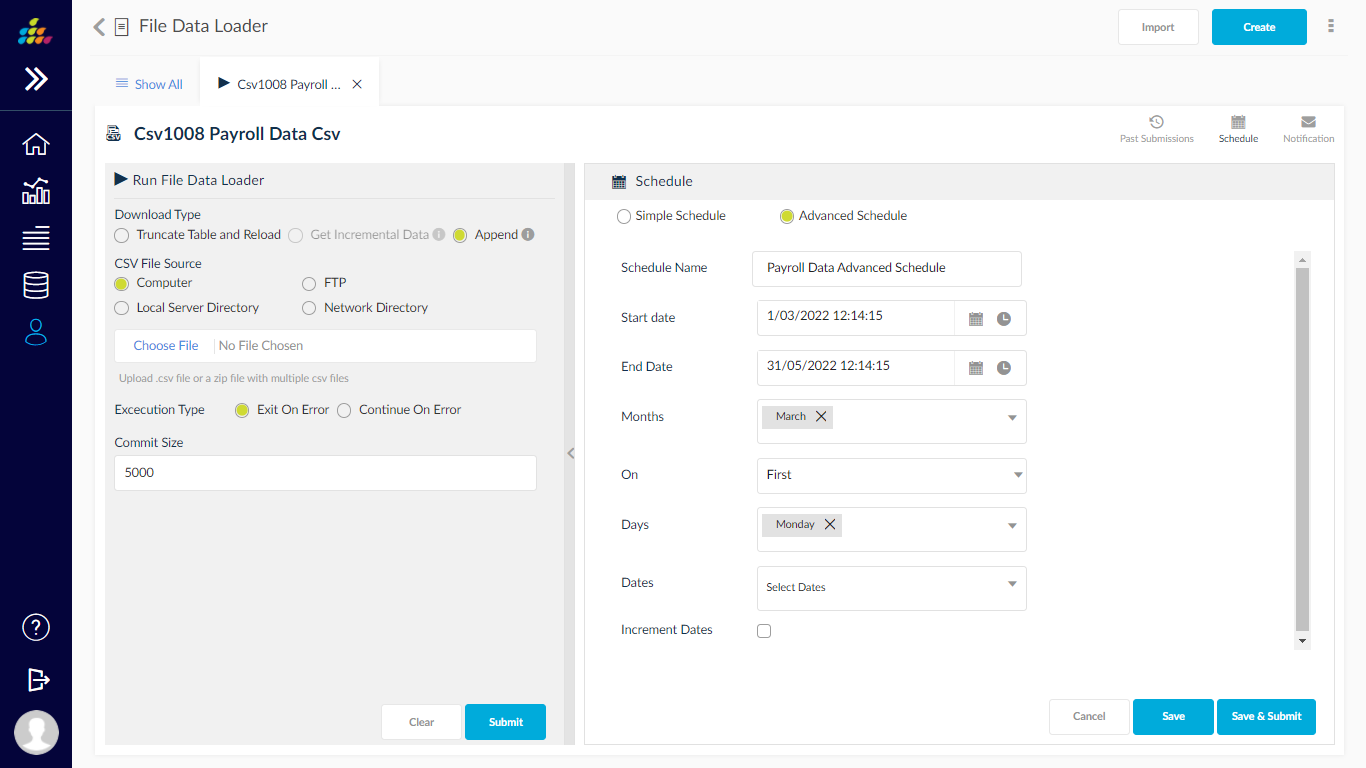
Schedule:User can schedule the job by using “Simple Schedule” or “Advance Schedule” option
Notification: By Using this option user will get the notifications after process completed.

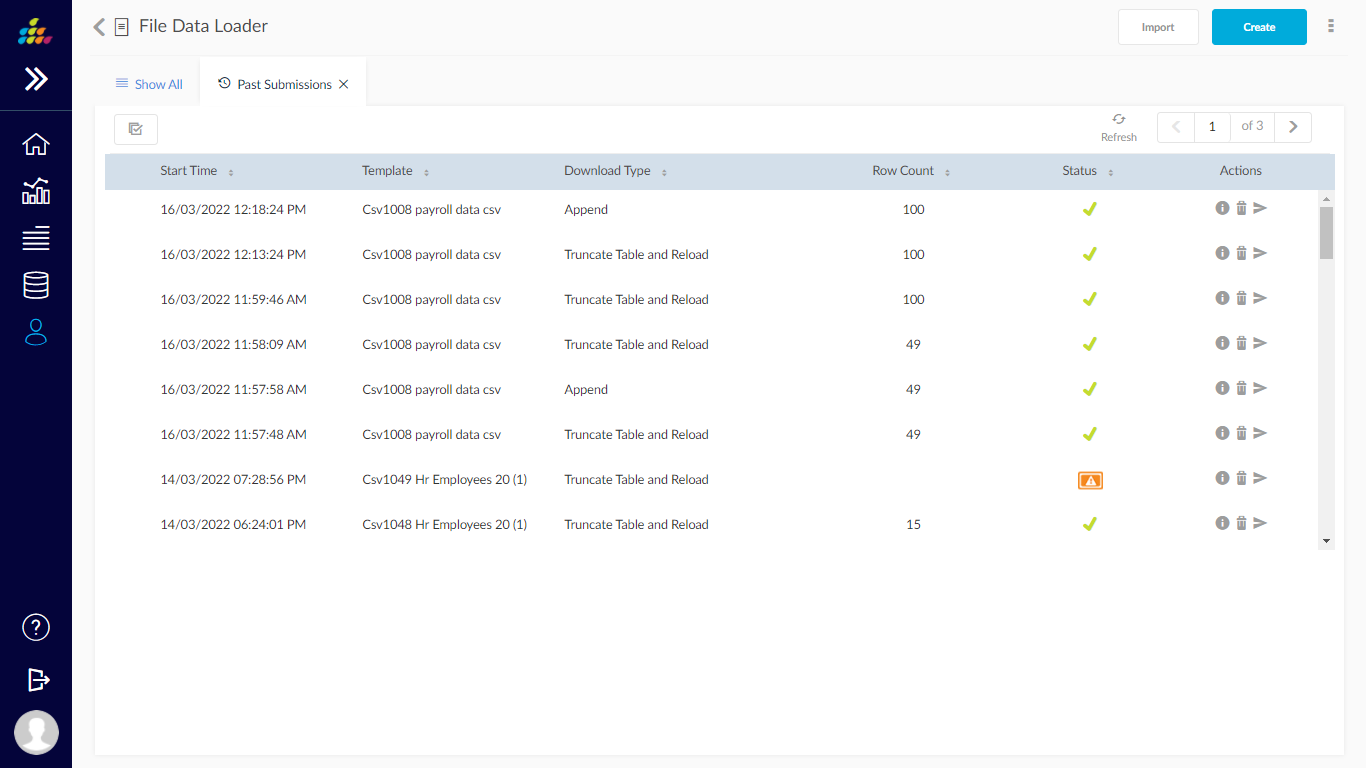
All Past Submission: - When user click on “All Past Submission” from more actions, user will able to view the previously submitted processes.
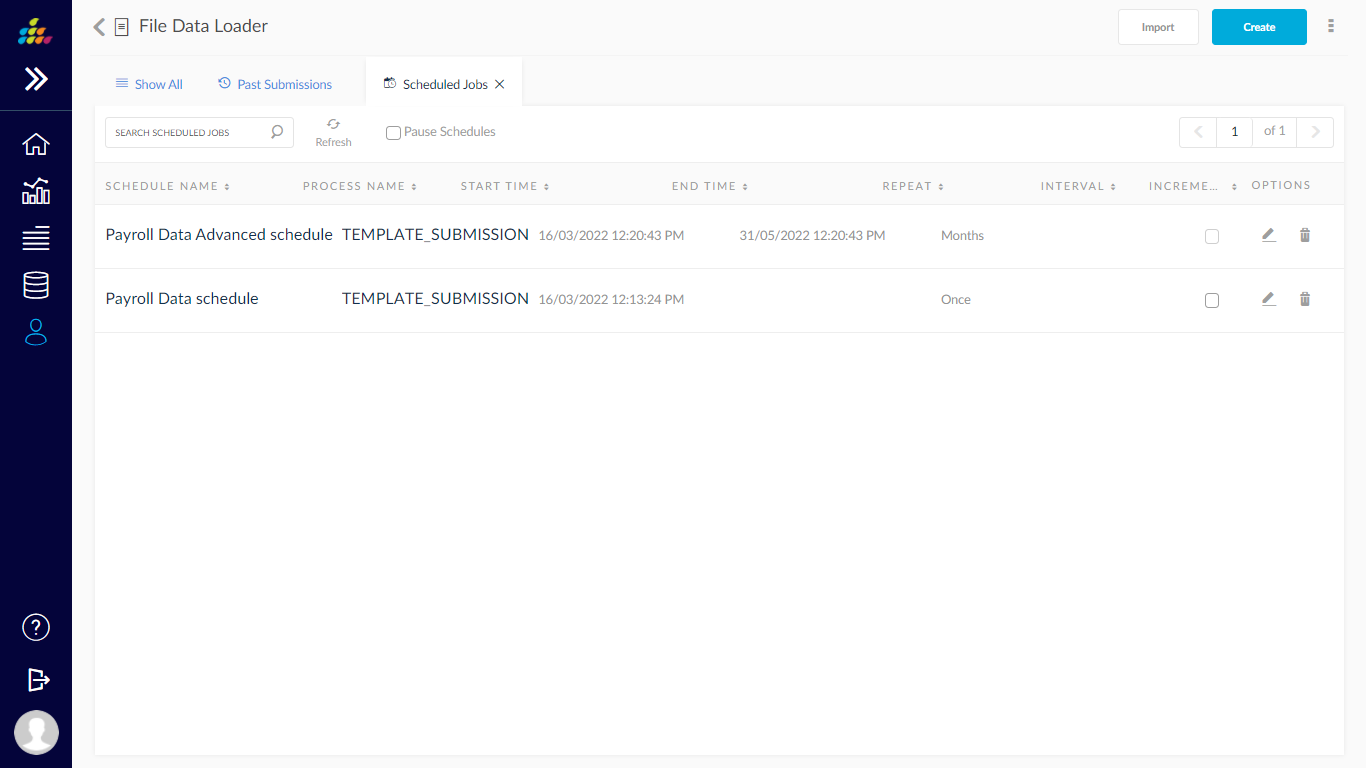
Scheduled Jobs: When user click on “Scheduled jobs” from more actions, will able to view all scheduled jobs list, here user can do modification by using Edit/delete button.
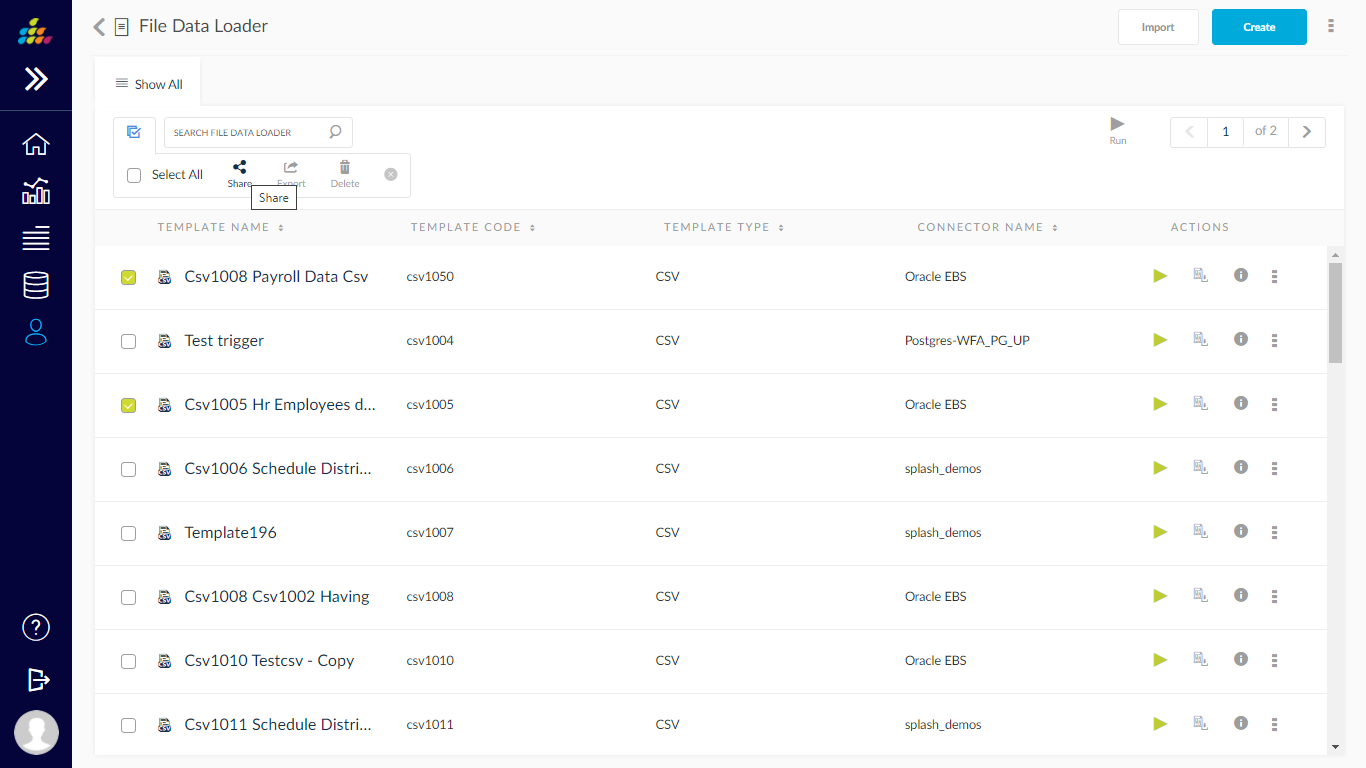
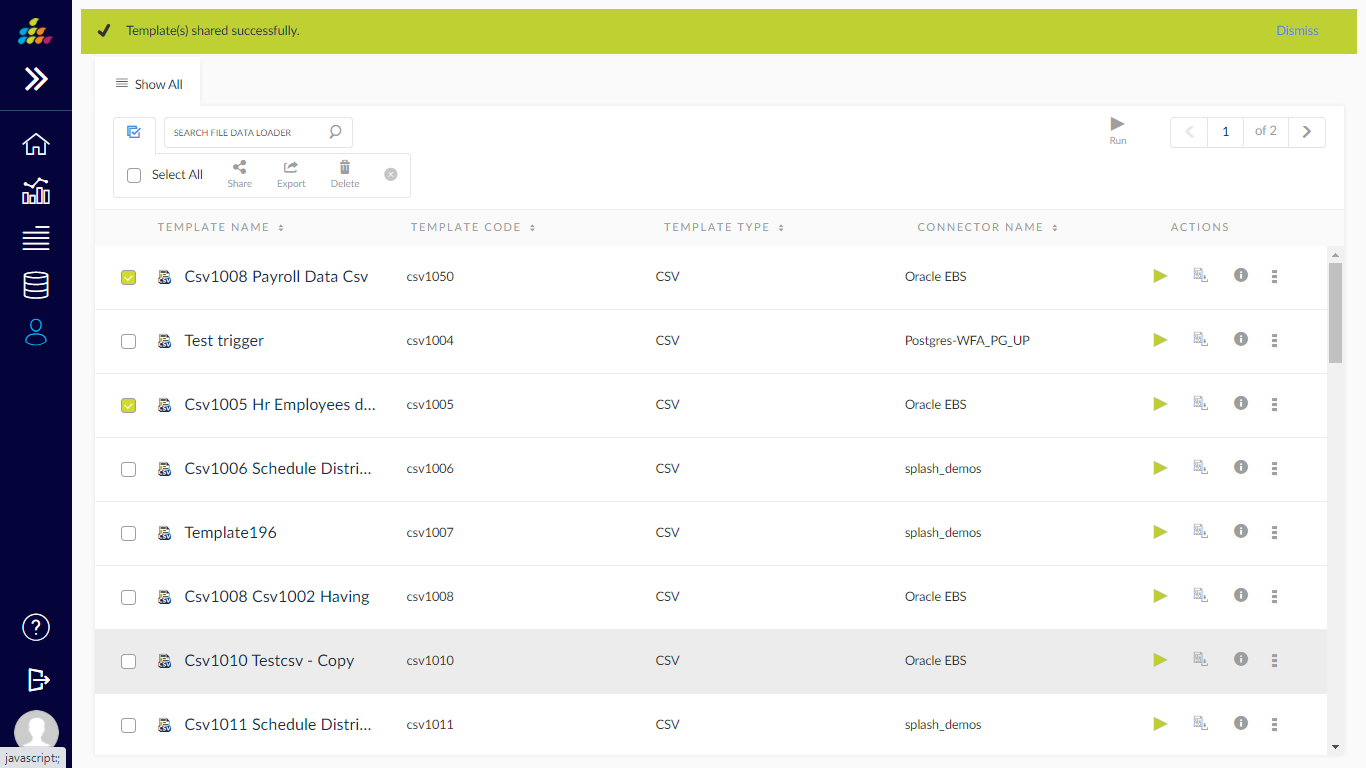
Share:User can share the file templates to “Users”, User Groups” & “Role Groups” by clicking share icon.

Export : User can export the file templates by clicking on “Export” icon.
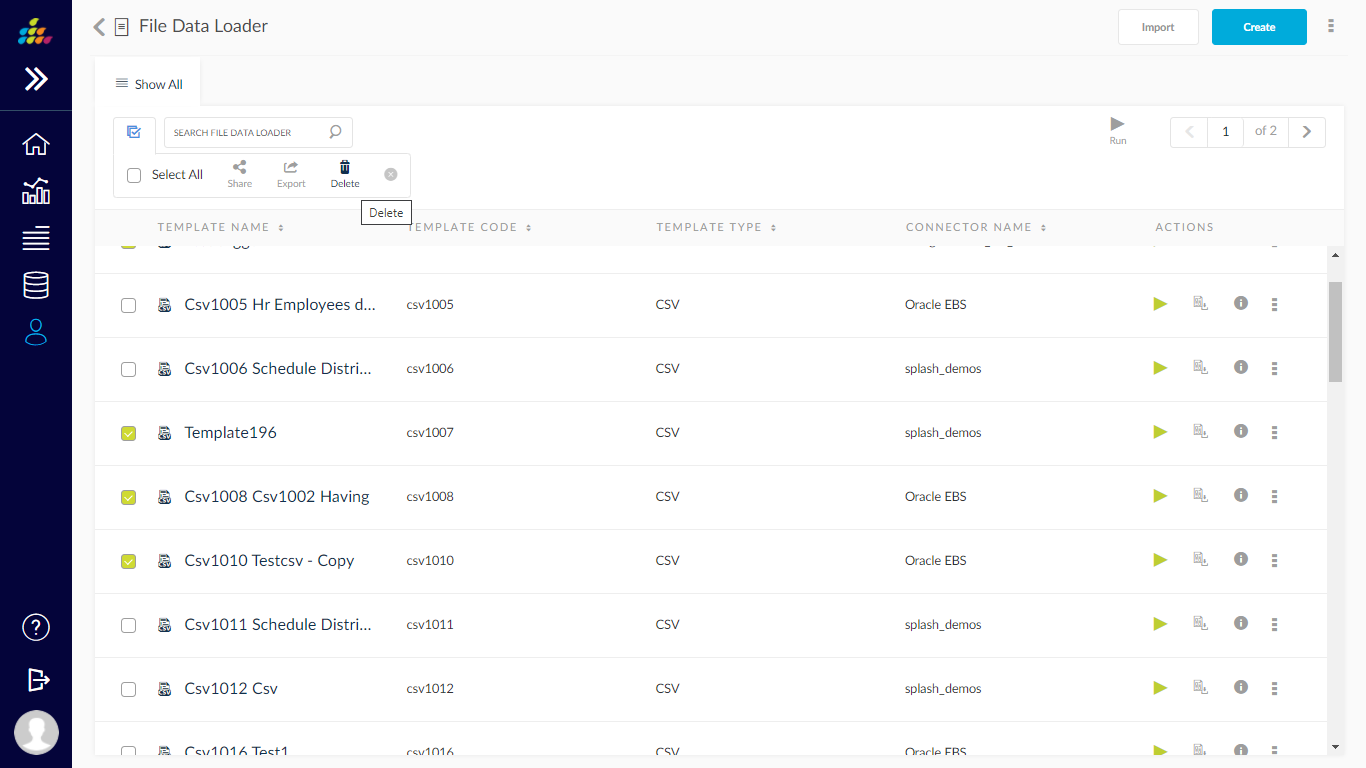
Delete: - User can delete the file templates by using the “Delete” button.
Import File Templates: - User can import the file templates by clicking on “Import” button, after choosing the file, click on “OK” button to import the file.
