Active Directory Settings
This screen is used to store the Active Directory details in SplashBI.
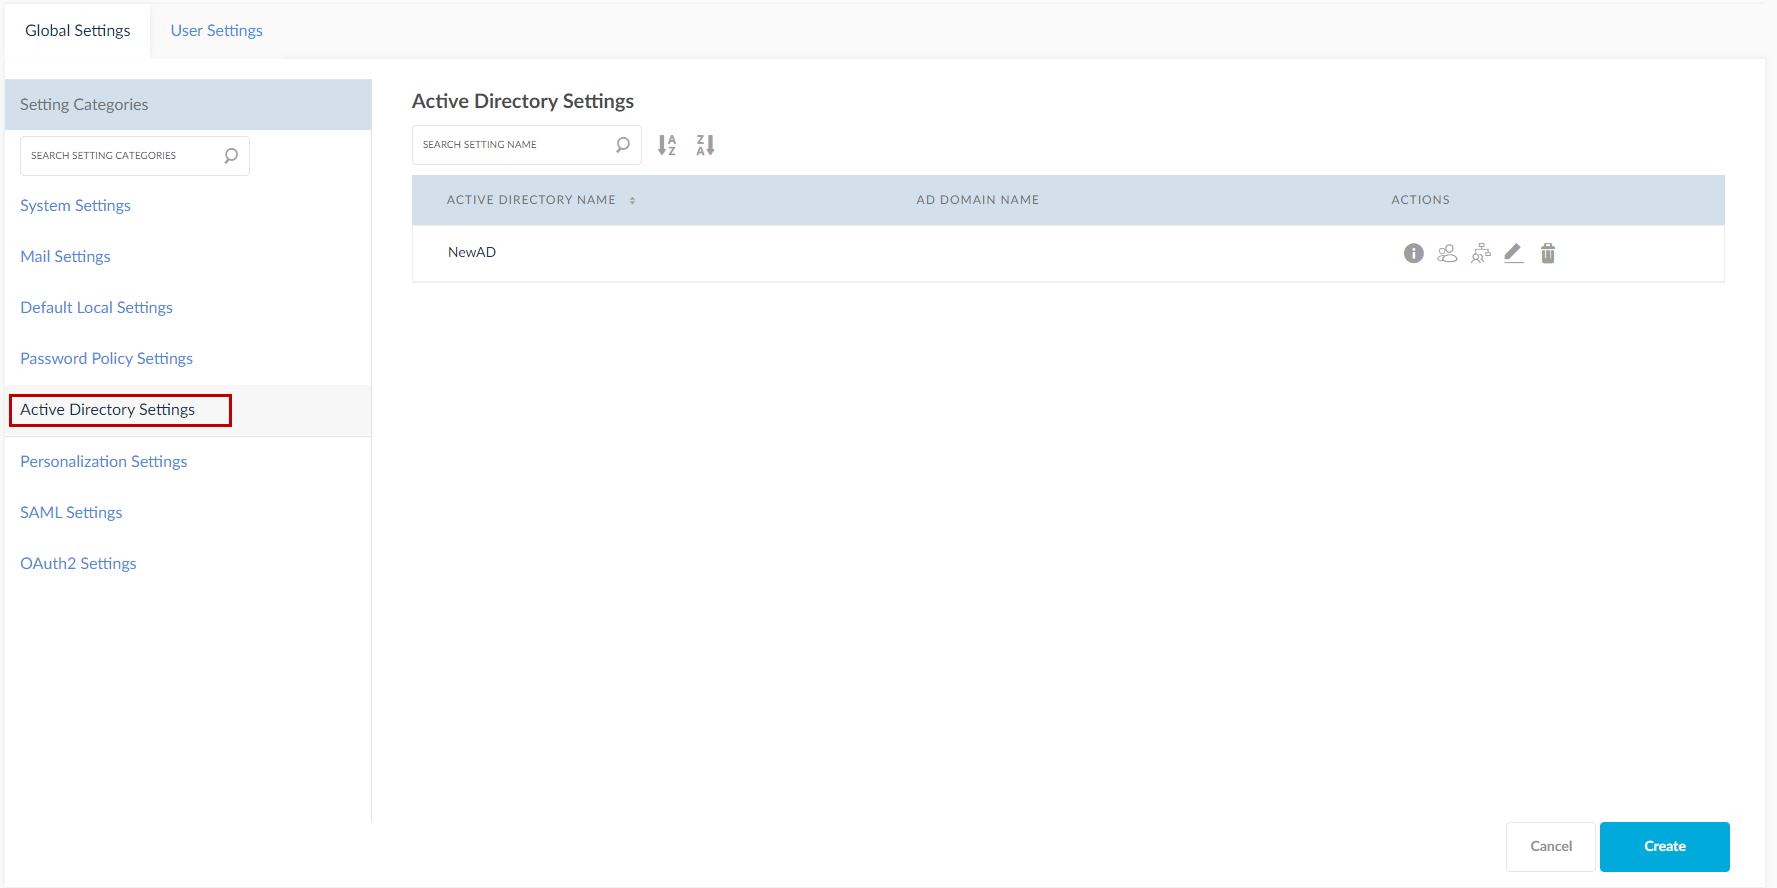
- Select Active Directory Settings from Global Settings.
- Click Create icon if some Active Directory Connection is already present.
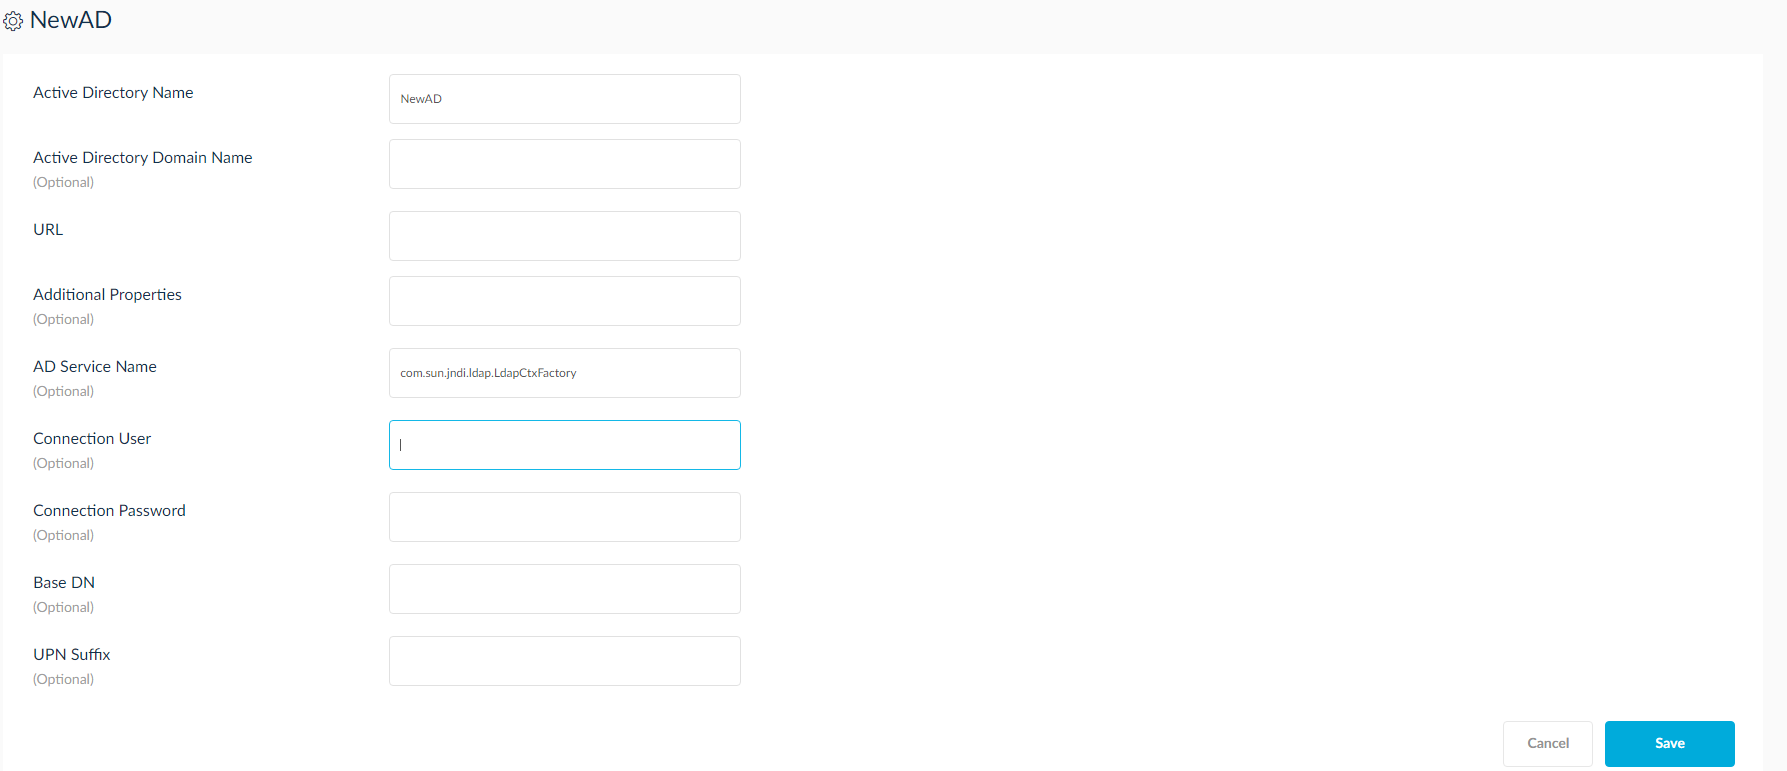
- Enter Active Directory Connection Name, it is mandatory .
- Enter Active Directory Domain Name, it is mandatory.
- Enter Active Directory URL mandatory, it is mandatory.
- Upon entering all required fields, click
 icon.
icon. - To delete, click
 icon.
icon.
- It display a pop up consisting of user list which uses that Active Directory Connection.
- The user can provide Multi Language for Active Directory Name.
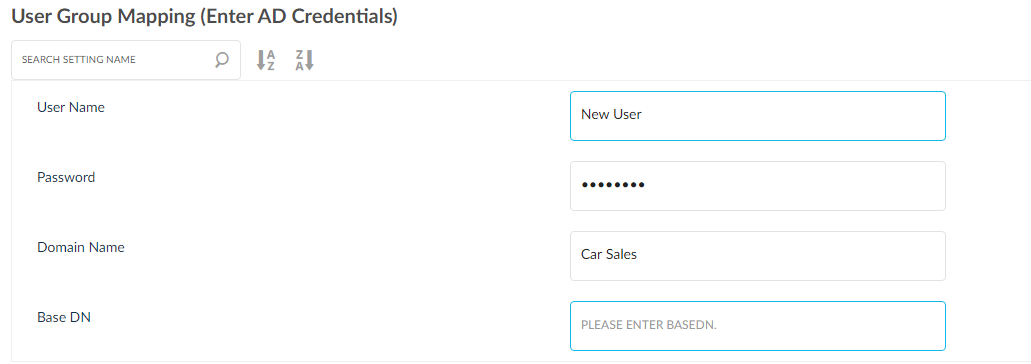
![]() : Click this icon to map user groups.
: Click this icon to map user groups.
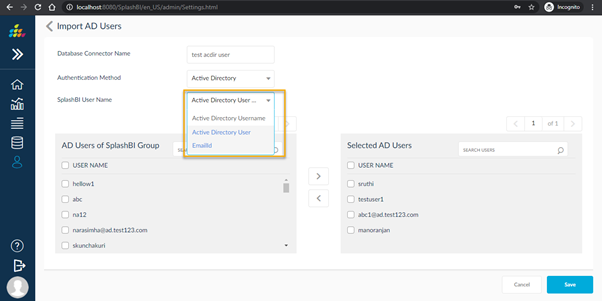
![]() : Click this icon to import active directory users.
: Click this icon to import active directory users.
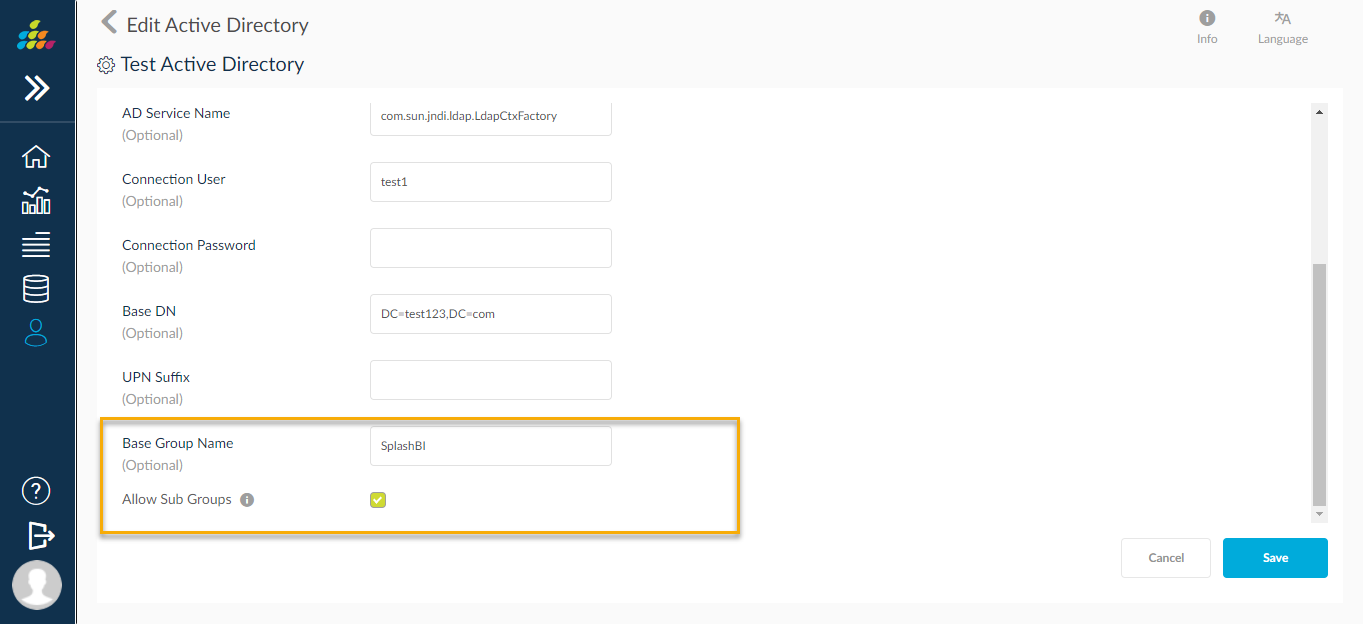
Base Group Name
In Active directory we added new features base group name and allow sub groups name
when you specify any group name, It will fetch that active directory details.
Allow Sub Groups
When we check the “Allow Sub Groups” check box, it will fetch all sub groups under base group
SplashBI User Name
While importing users from Active directory, user have an option to choose SplashBI user Name in different format like UserName, Email-Id. If user select Email-Id option, email-Id will reflect user name in SplashBI .
If user select “Active Directory user name” tenant sub-domain value will display, user Name in SplashBI will be combination of user Name and sub domain.
Ex:- ABOASE@SplashBI.com is new user name