Create/Edit List Of Values (LOVs)
Creating LOV
Click the ![]() icon to create a new LOV. A pop up Create List Of Values (LOV) is displayed. Enter values for the below fields.
icon to create a new LOV. A pop up Create List Of Values (LOV) is displayed. Enter values for the below fields.
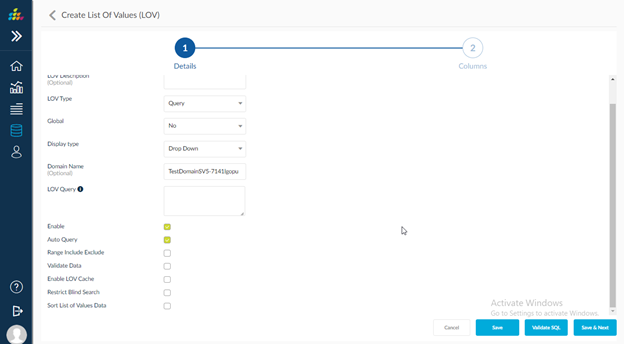
- LOV Name: Enter the LOV Name.
- LOV Description: Enter the description of the LOV.
- LOV Type: Choose Query or comma separated values from the drop down.
- Global: Choose Domain/Global values from the drop down. If the LOV has global scope, then other domains can share the same LOV.
- Domain Name: Read only, when global is selected as No.
- LOV Query: Provide SQL query to give the values of the SQL as the List of Values which can be used to build the report.
- Enable: Click the check box to enable or disable the LOV.
- Auto Query: Checking this option will return the values of the LOV as they are selected in the Submit page.
- Validate Data: Validates the entered return display data comparing it with the return value data. If there exists a value then the filter is executed with that value. Else, an error message is displayed.
- Validate SQL: Validates the entered LOV query.
- Save: Click Save to save the LOV.
- Cancel: Click Cancel to close the pop up without saving the changes made.
- Range Include /Exclude: Enable this to provide the option of selection the ranges in the filter data of pop up display type .
- Click Save & Next.
- In the next page choose between the following options:
- Return Display Data: This will be the default return data that is displayed when the user selects an LOV.
- Return Value: This is the value that is returned when the report is run.
- Use As Tooltip: When the user hovers the mouse over the return display data, this value is displayed.

- Click Save.
- Go to Reports and click Create.
- Select the same domain on which LOV was created.
- Move the columns from the table. The user should note that using the same table that is used in the LOV query will yield better results. Here, for example, the order details table is used.
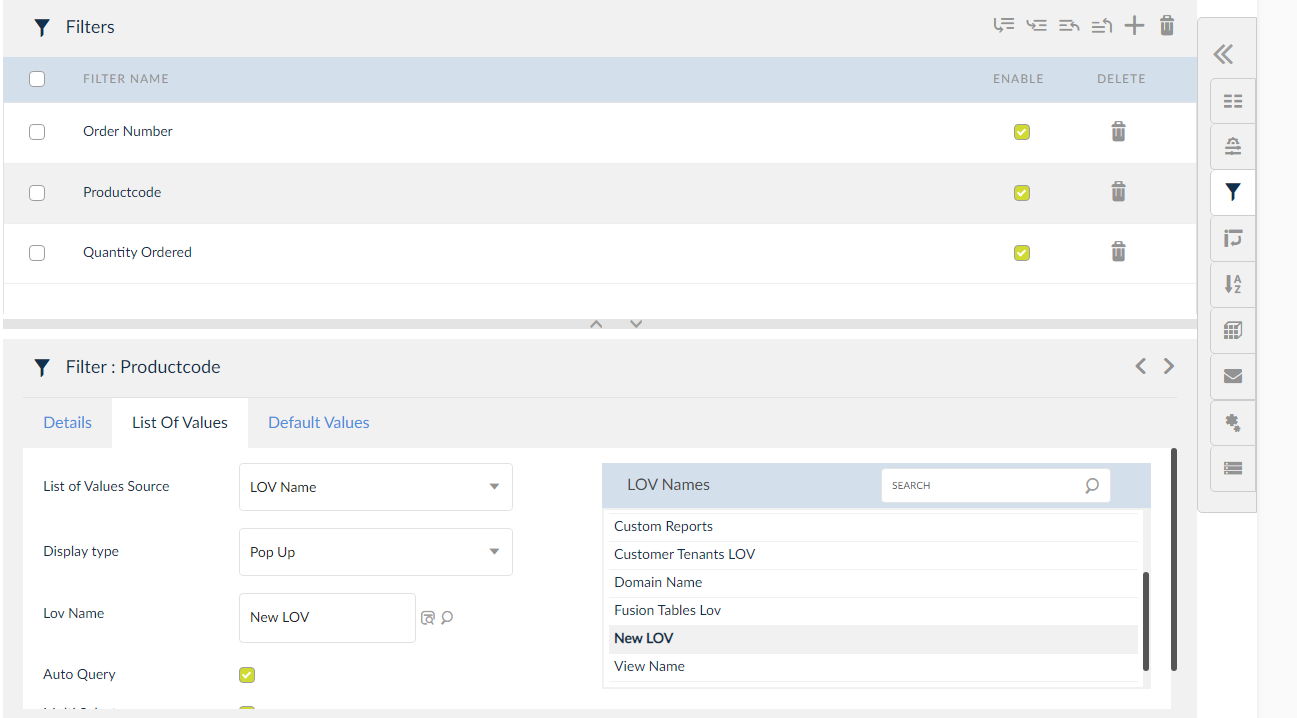
- In filters, select the List of Values tab and from the List of Values Source drop-down, select LOV Name as the option.
NOTE: The column that is assigned as the Return Value should be connected to the created LOV. Else, an error is thrown during the report execution.
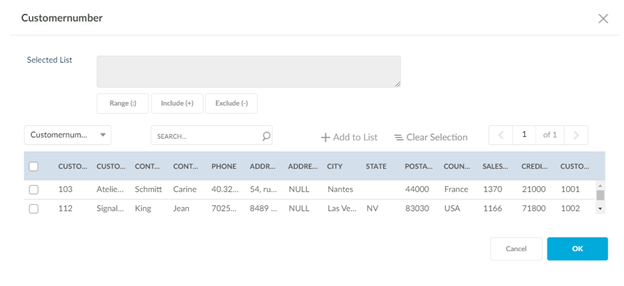
- Click the Default Values tab and select Specific Value and click the torch icon.
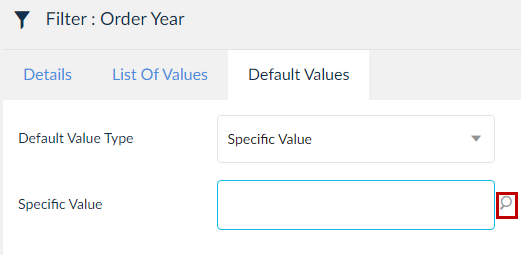

- Hovering your mouse icon on any item in the column will display the value of the item selected as a tooltip.
- Click Save and Run the report.
- Enter the LOV's and click Submit. Note that any LOV entered is displayed as the Return Display Data. In the below image, observe that the Return Value column Productcode takes the Return Display Data Order Number as the value.
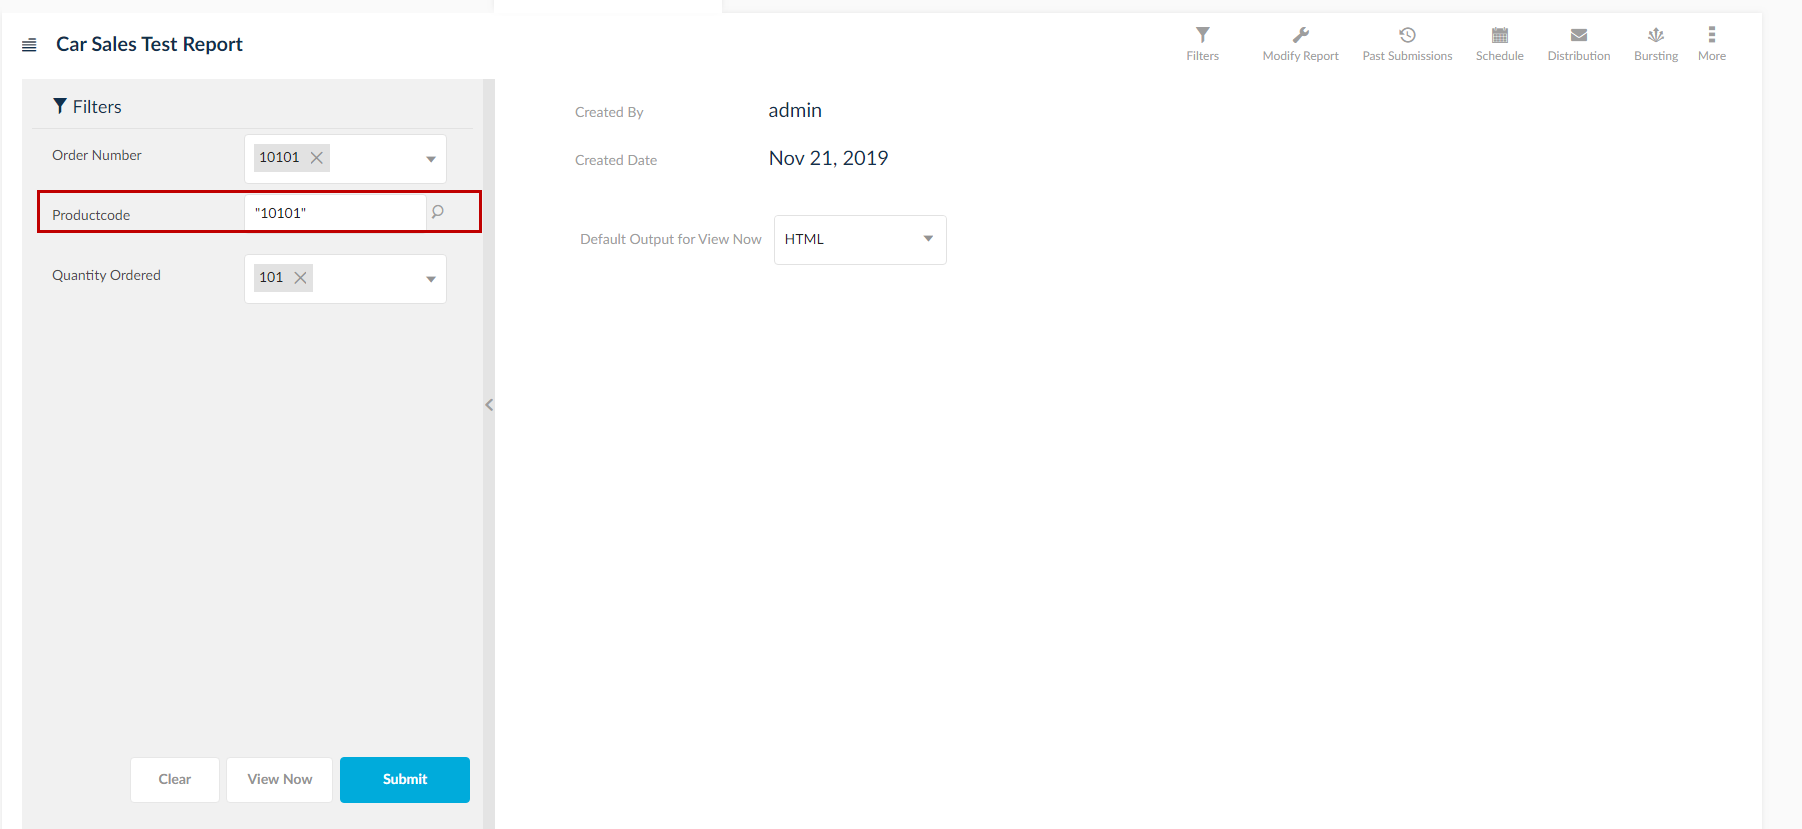
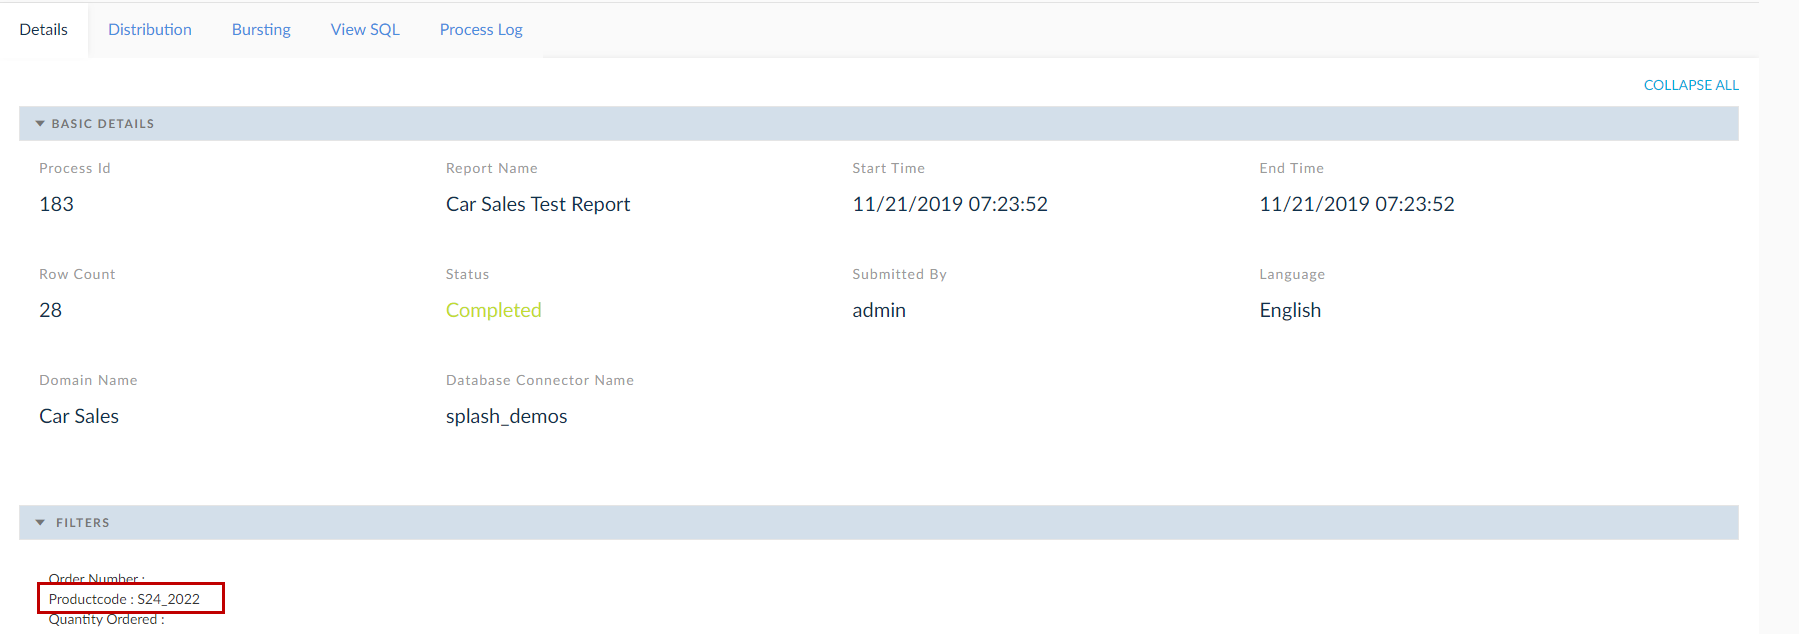
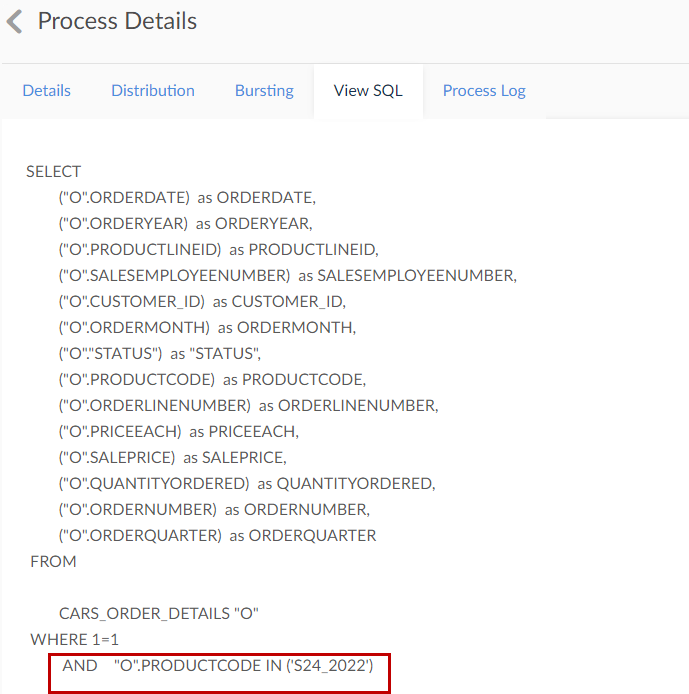
- Clicking the info icon will display the values of the filters. Here observe that only product code filter was configured to the created LOV, hence the return value is displayed. Observe that the Productcode value is returned and is displayed. The same can be observed in the View SQL tab also.
Edit LOV
To edit an LOV, click the ![]() icon next to the LOV Name. The creation page for the LOV is displayed where you can edit the values.
icon next to the LOV Name. The creation page for the LOV is displayed where you can edit the values.
