Creating Prediction
- Click the create icon.
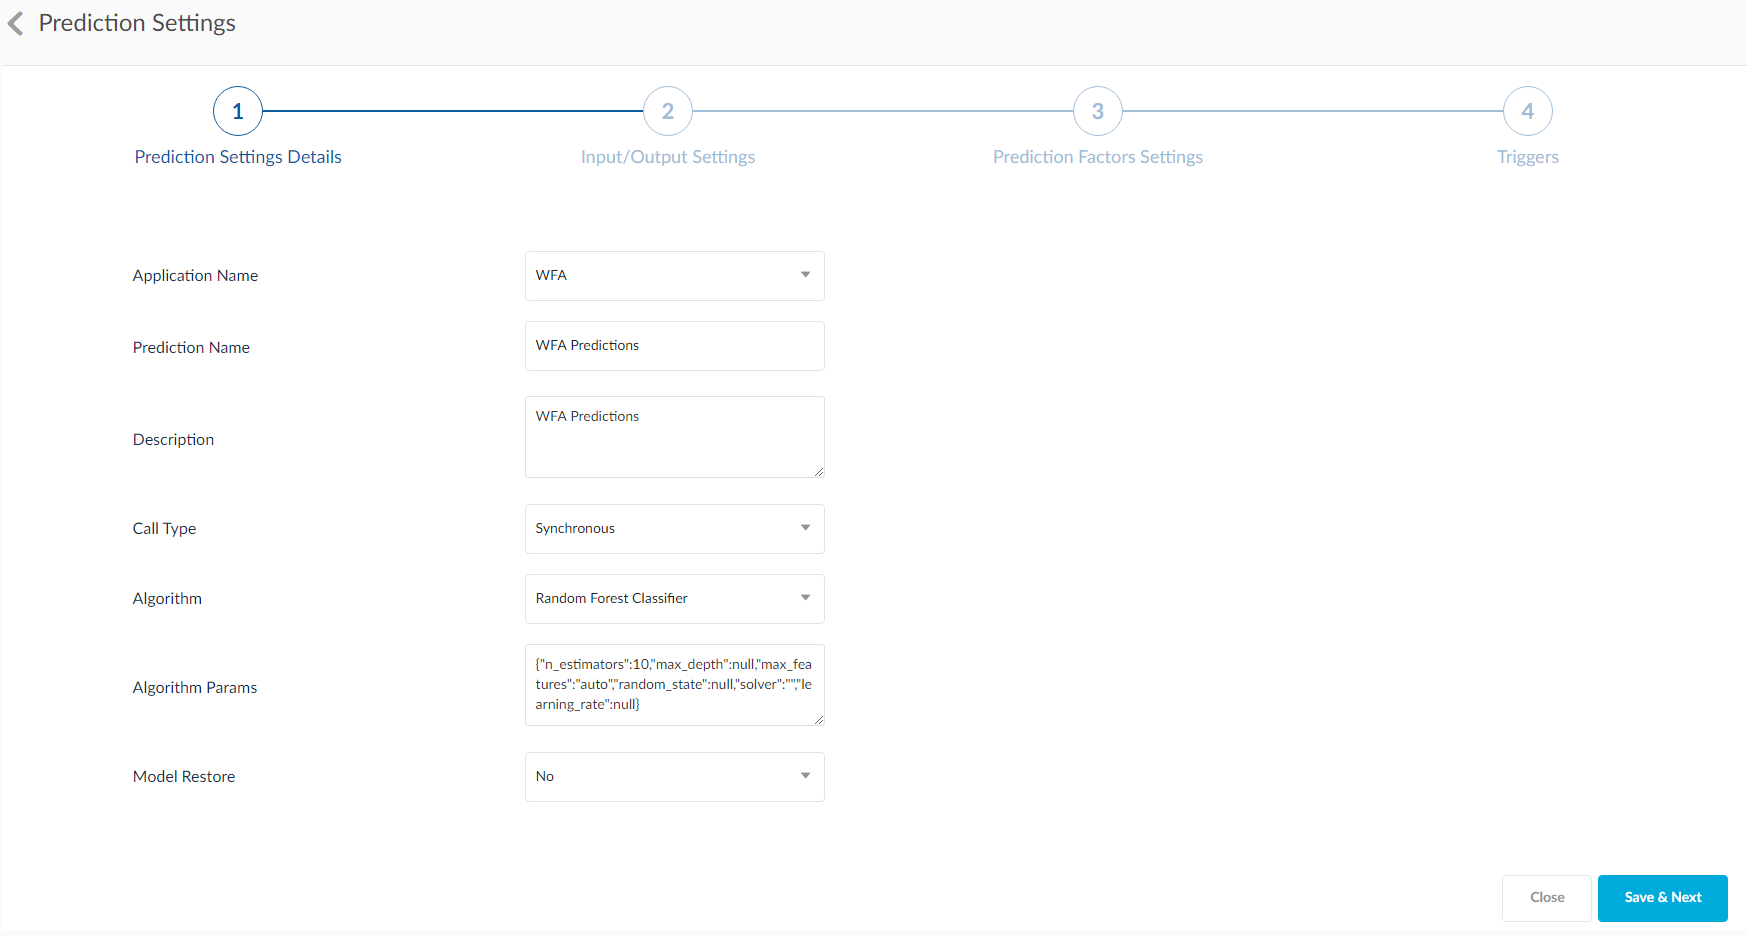
- In the prediction settings page, fill the following fields:
- Application Name: This is the kind of business area where prediction needs to be applied. The options available are CRM (Customer Relation Management), WFA ( Workforce Analytics) and Generic.
- Prediction Name: Give a name to your prediction.
- Call Type: There are two options here:
- Synchronous: Selecting this option will run multiple predictions simultaneously.
- Asynchronous: Selecting this option will run one single prediction process at one time, the next process will run after the current process is completed.
- Algorithm: There are multiple pre-built algorithms that can be used to run the prediction process as per need.
- Algorithm Params: This field will be auto filled with the algorithm parameters when a algorithm is selected.
- Model Restore: Selecting Yes will store the current prediction model for further reference and usage.
- Click Save & Next.
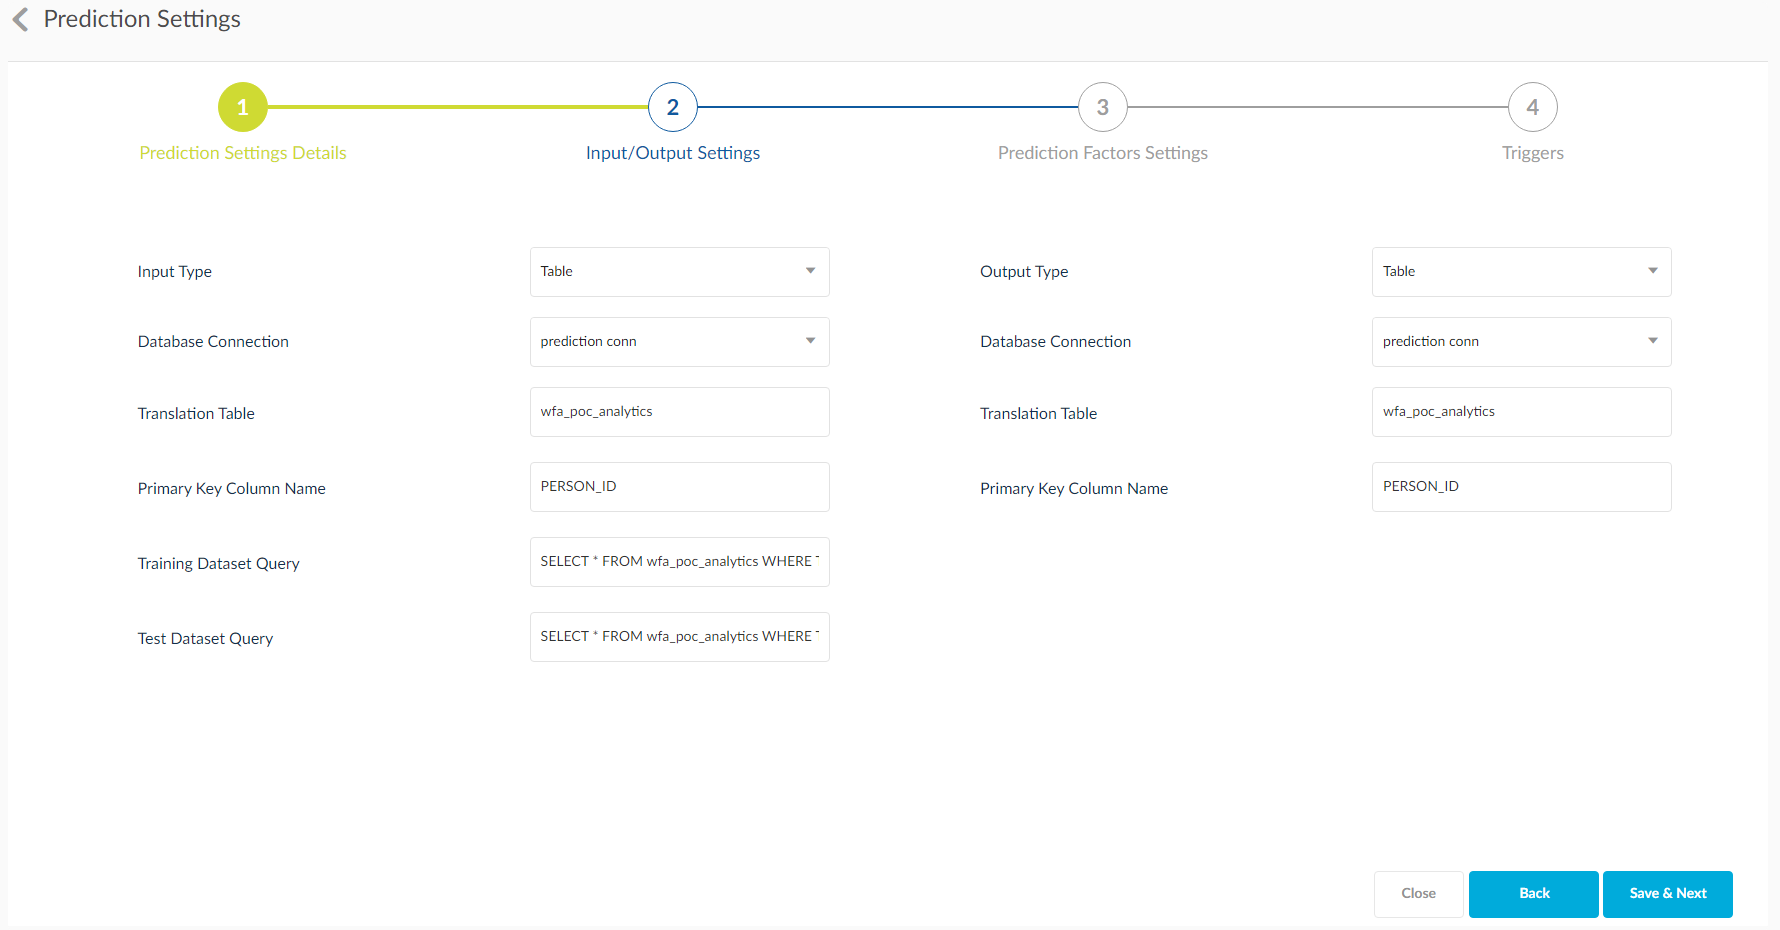
- In the Input/Output Settings page fill the following details:
- Input Type: Select the type of data input you would be providing. There are two options here: Table and File. This data should be same for the output.
- Select the database connection from the drop down provided. This data should be same for the output.
- Translation Table: For Prediction to work, the entire table content should be in numerical format, for that purpose a translation table is used. Enter the table name here. This data should be same for the output.
- Primary Key Column: This is the primary key in the table. This data should be same for the output.
- Training Dataset Query: For every prediction to work properly, the system is fed with proven data that is used as a reference for any prediction to take place. Training Dataset Query represents that proven data from which inferences are taken. This constitutes for 80% of the data
- Test Dataset Query: This is the query for the prediction is executed. This constitutes for 20% of the data.
- Click Save & Next.
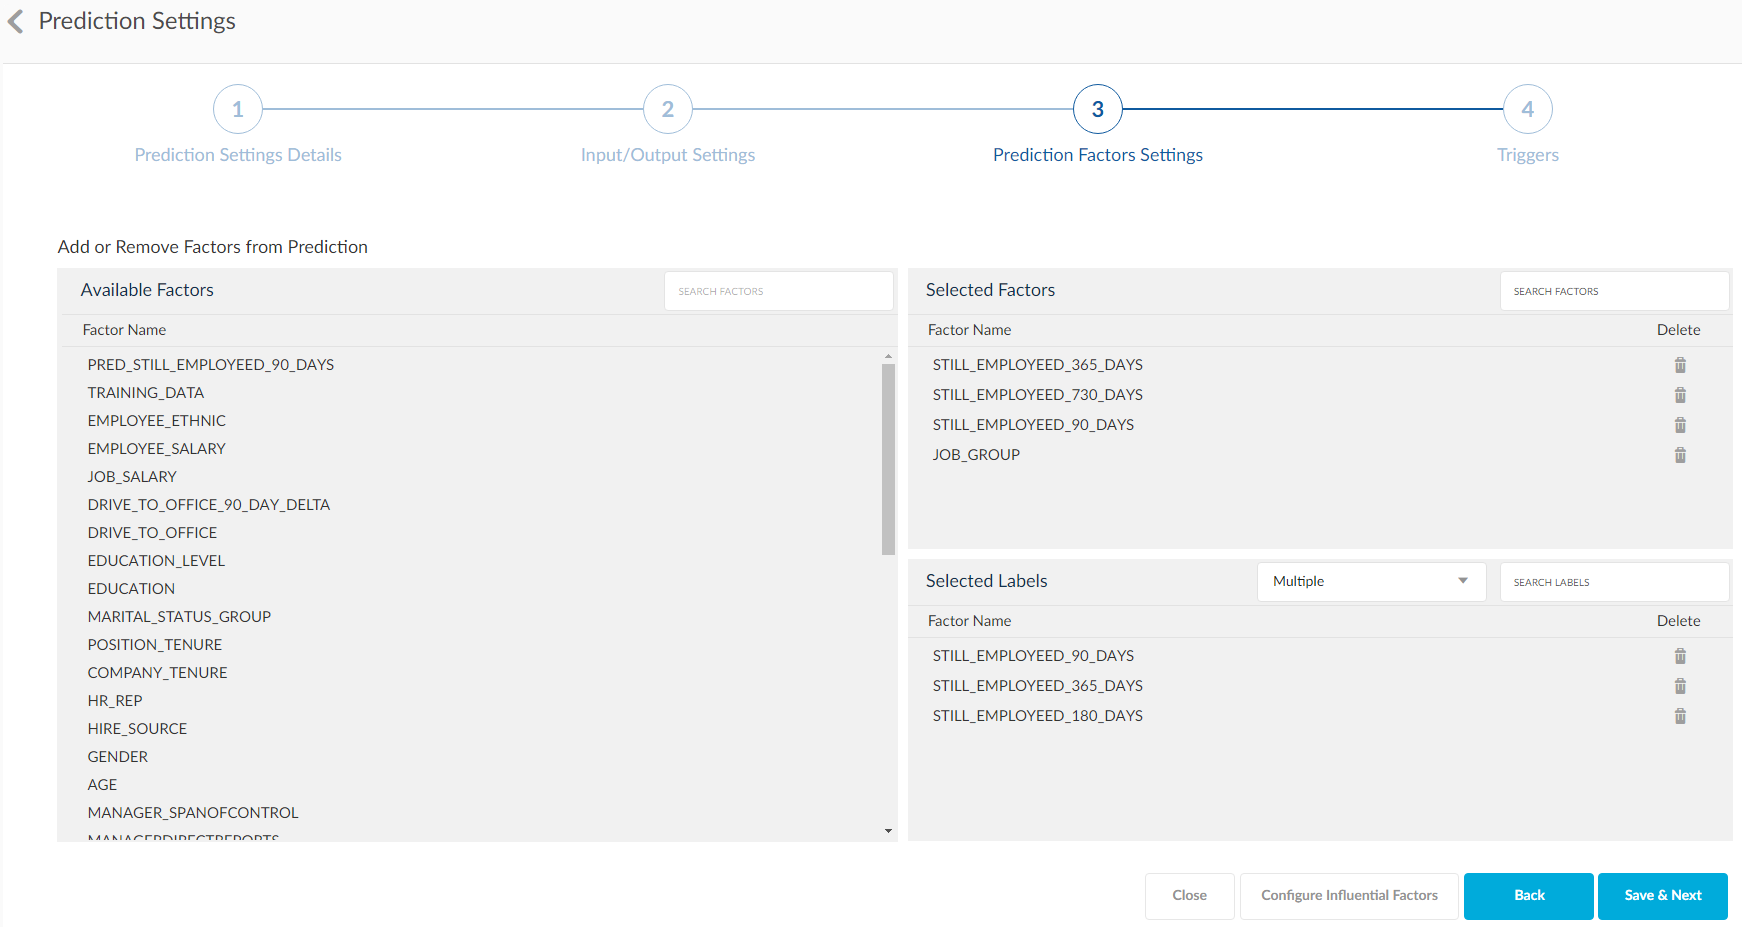
- In the next step, you can select the factors on which you need predictions to happen.
- You have all the available factors from which you can move them to X-axis (Selected Factors), and Y-axis (Selected Labels). In the selected labels section there are two options: Dependent and Multiple.
- Select multiple if there are more than two entries used for prediction. Select Dependent for at most 3 entries. Dependent will execute the prediction query for the first entry and then depending on the first entry result, the second entry is executed.
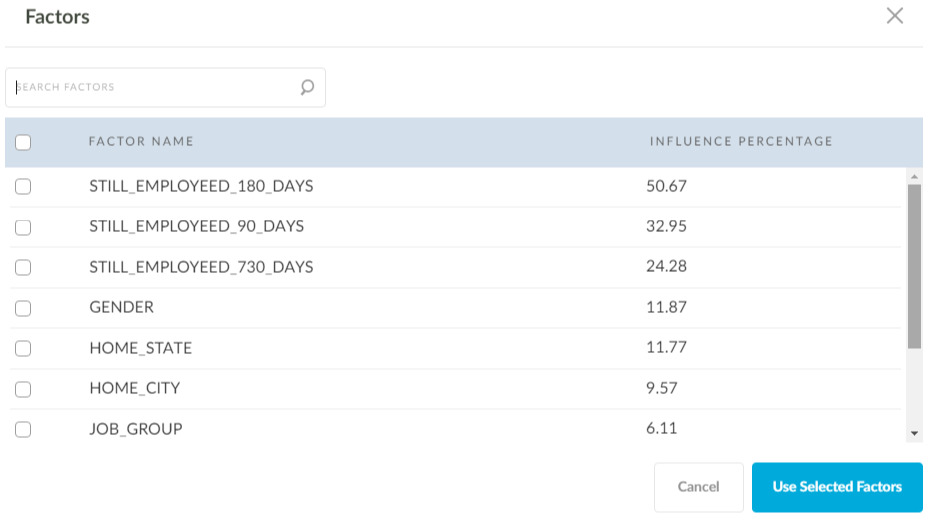
- Click Configure Influential Factors. This option displays a pop-up where the influence percentage of a particular factor is displayed. Select the factors and click Use Selected Factors.
- Click Save & Next.
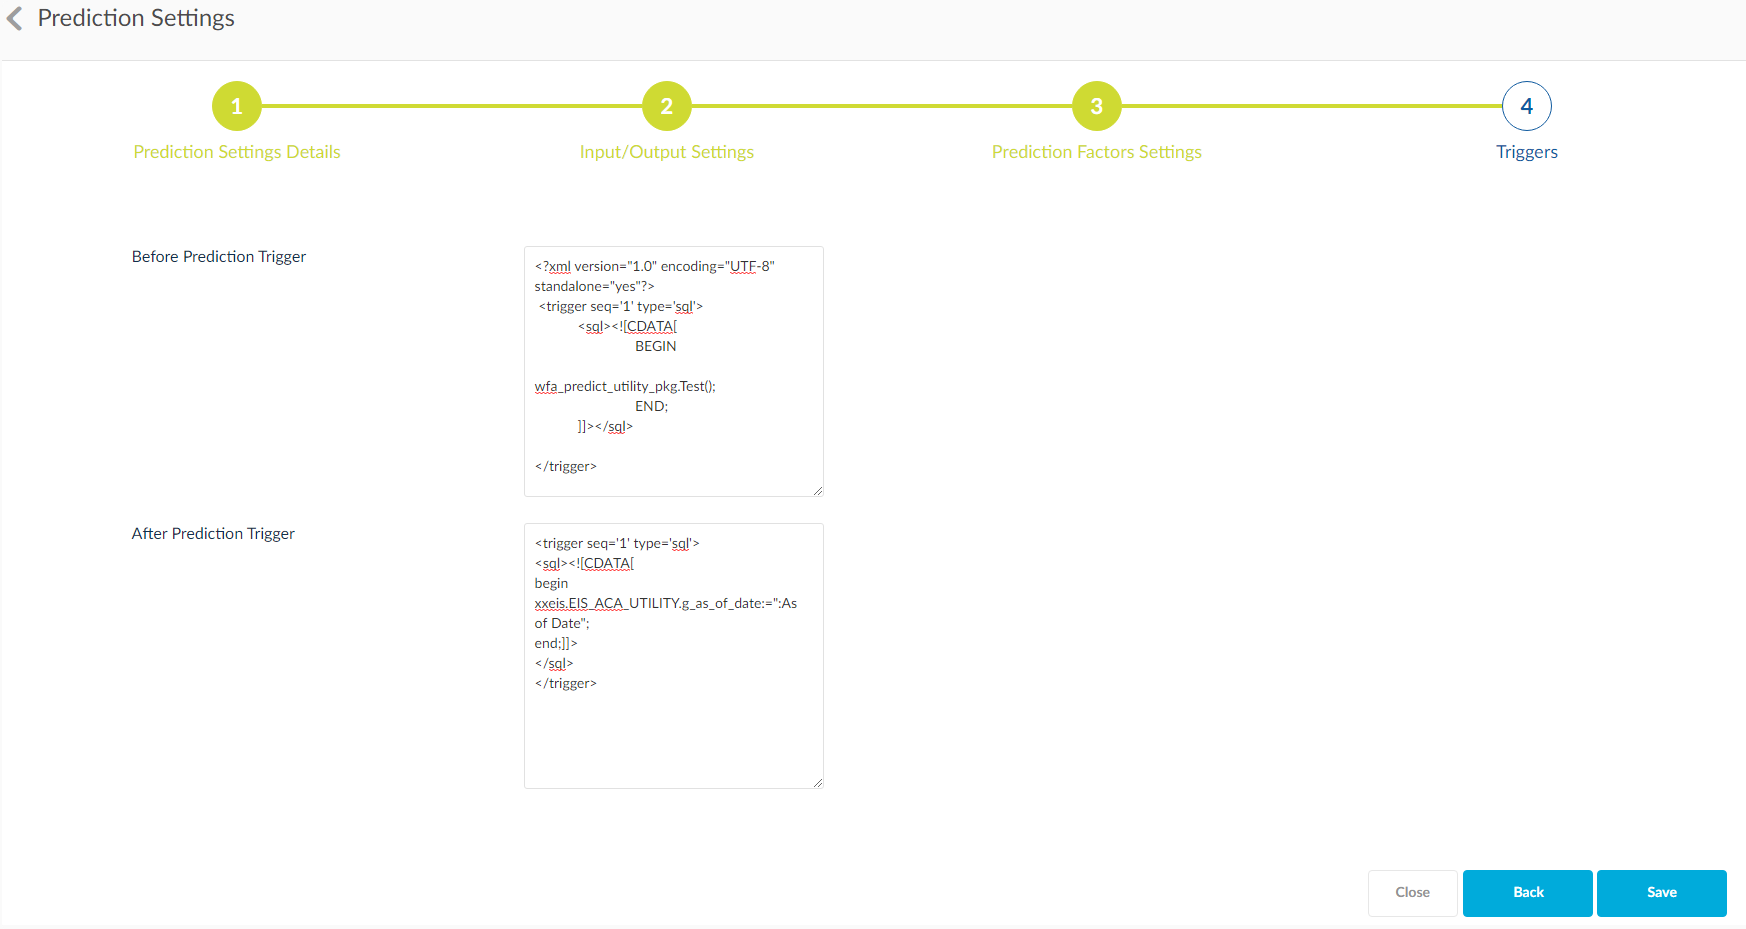
- Enter the trigger queries in the before and after fields.