Creating and Editing Domains
Domains are created or edited to include new tables, views, synonyms, materialized views and LOVs enabling customization of the data source in a domain to organize objects.
Create a Domain
- To create a new domain, click the
 icon at the top of the screen.
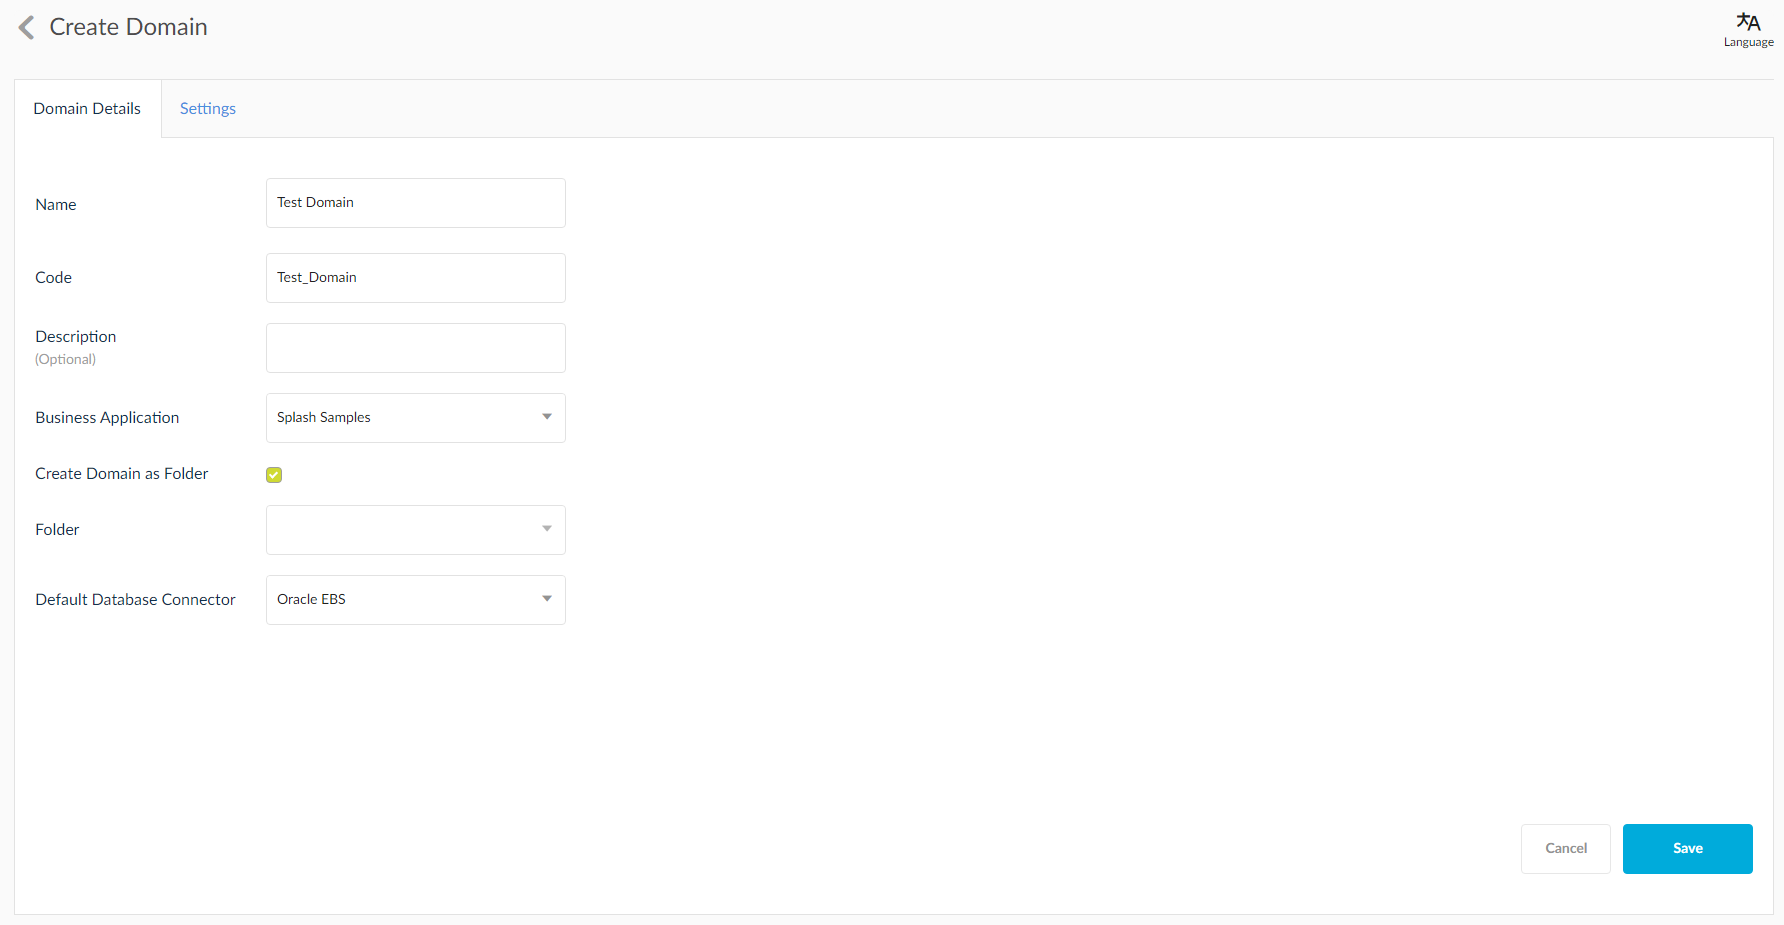
2. Enter the following details:
- Name: Name of the domain.
- Code: Code which uniquely identifies the domain.
- Description: Description for the domain.
- Business Application: Business Application in which this domain should be created.
- Create Domain as Folder: If this check box is selected, a new domain group is also created along with the domain with the same name. The folder name will be the domain name. The Folder text box will be disabled.
- Folder: Select the folder in which the domain should be created. Click the
 icon to create a new folder or select from the drop down.
- Default Database Connection: Connection to be used for the domain.
3. Click Save to save the domain.
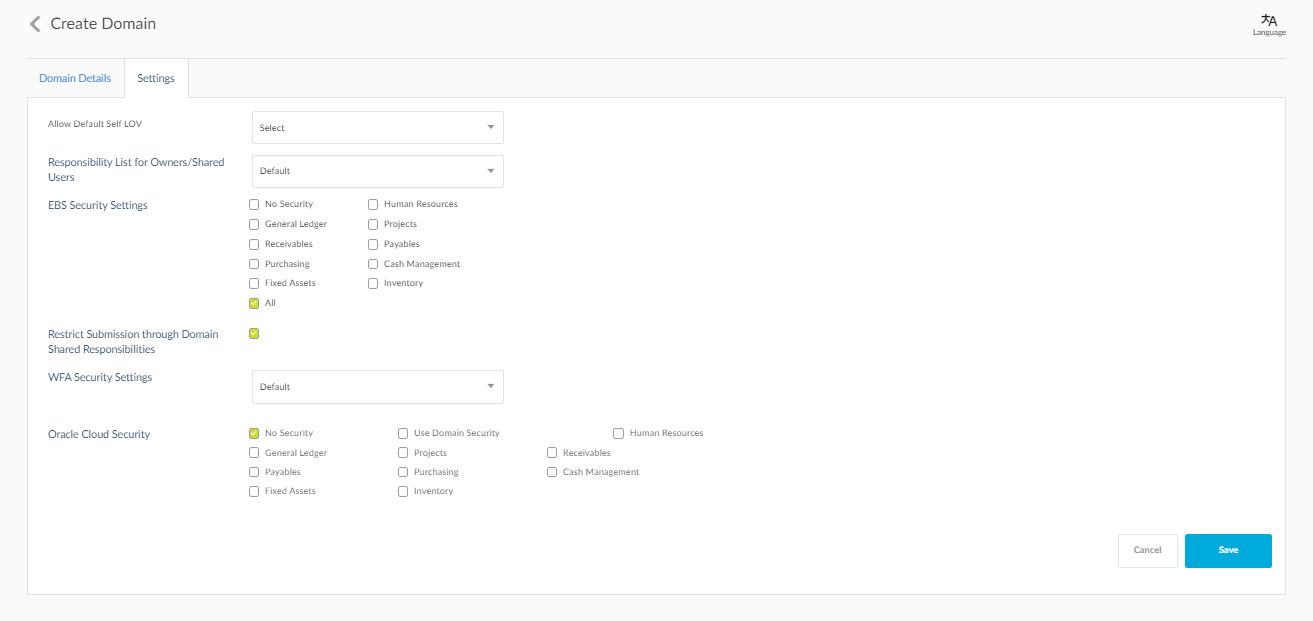
Settings Tab:
- Allow Default Self LOV: This option has three options: Yes, No and Default. Selecting Yes as the option will enable the self lov drop down under the LOV tab in filters for both EBS and Non EBS domains. Choosing NO will enable the text box for LOV by default and choosing default will display self LOV drop down for Non-EBS domains and Text box for EBS domains. These LOV settings will be reflected in the report LOV's that use these domains.
- Choosing Oracle Cloud/EBS Applications will redirect you to the Settings page after you click Save for you to choose the Oracle Cloud/EBS Security modules. Checking any or multiple modules in here will enable a security layer for those modules when shared by to other users.
- Select from the drop down the options for the WFA Security Settings.
- Responsibility List for Owners/Shared Users:When one of the "Report Owner Responsibility List (EBS Only)" setting value is set, and this value "Restrict Report Submission with these responsibilities" is set in domain level, then during report submission, on report run page, in responsibility drop down , the intersection of domain shared responsibilities and report all owners responsibilities or shared responsibilities will be shown.
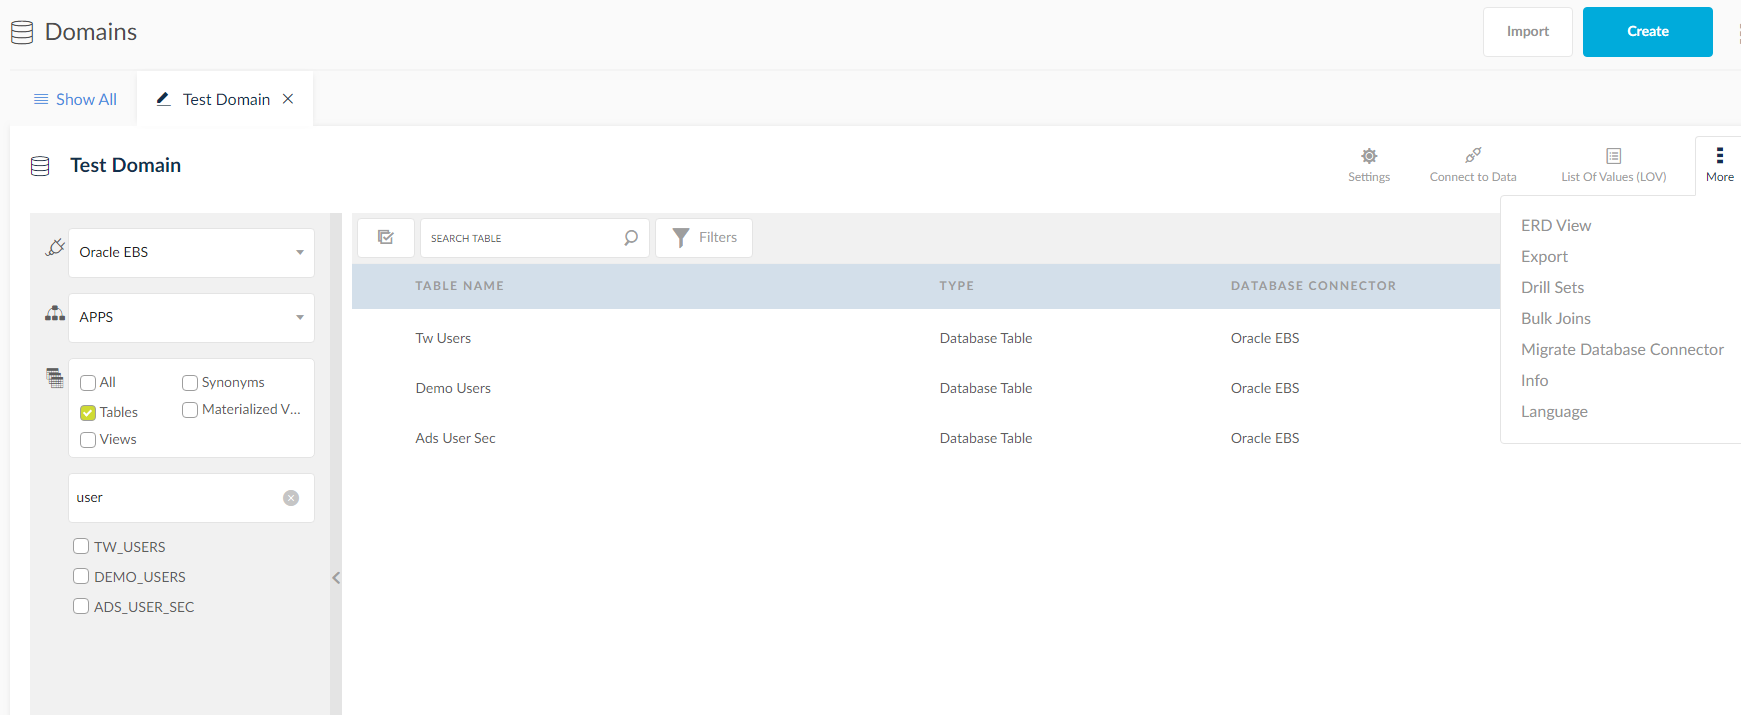
After clicking Save, you will be redirected to the created domain page, where you can drag and drop tables, edit them, view drill sets, bulk joins, ERD view, List of values, Connect to data, export and delete.
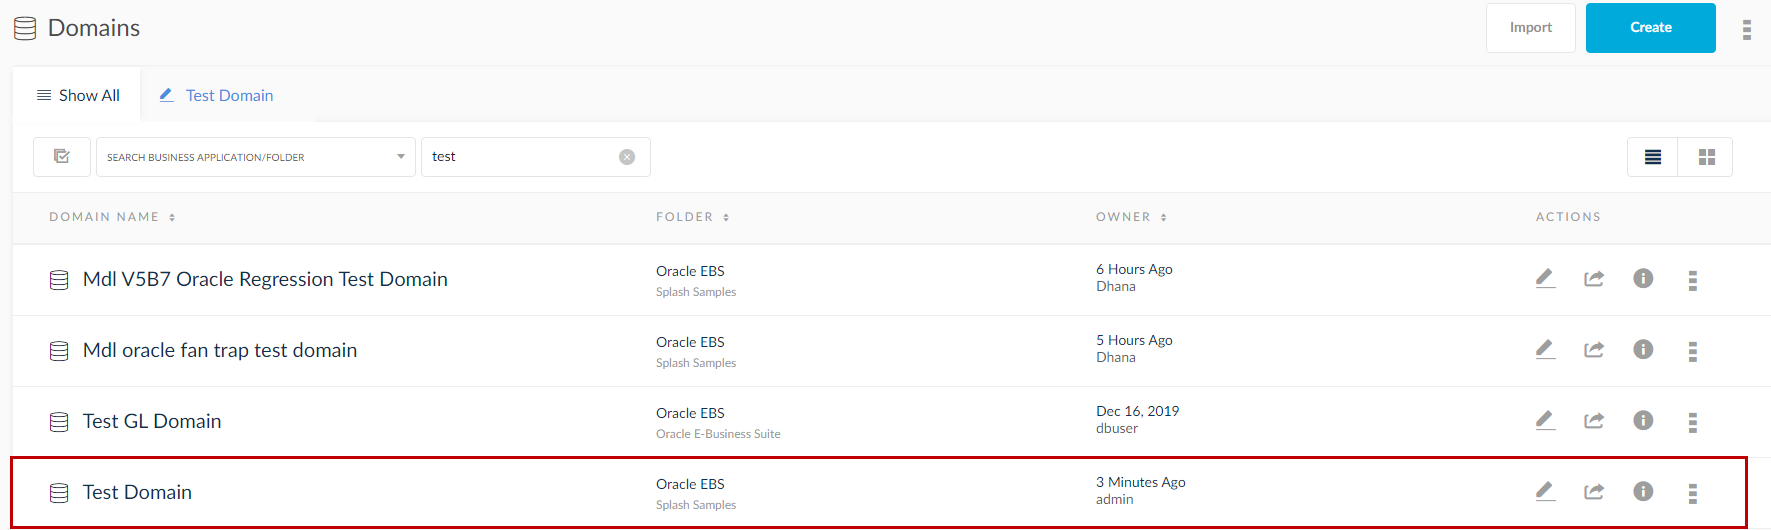
The created domain is visible in the All Domains page.
Edit Page and Options
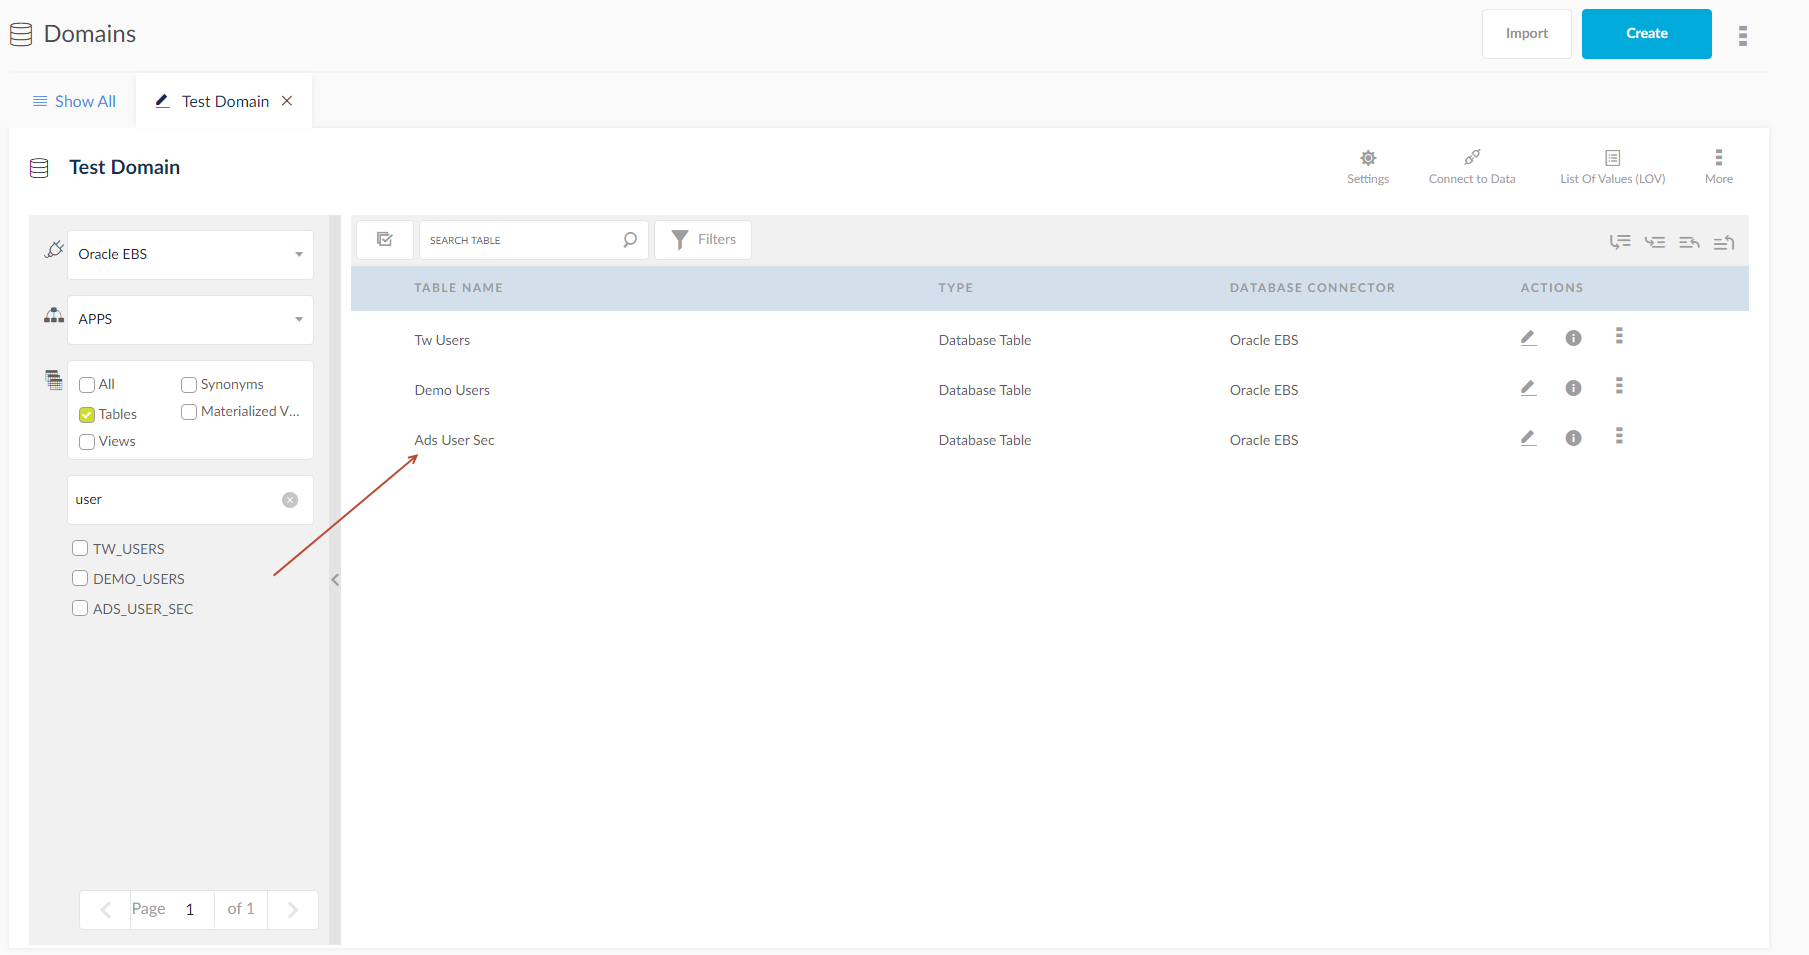
To edit an existing domain, search for the domain you wanted to edit and click the ![]() icon. The list of tables present in the domain will be visible. Each table can be edited. There are also other options present in the window.
icon. The list of tables present in the domain will be visible. Each table can be edited. There are also other options present in the window.
- Click the
 icon to export the domain to other SplashBI Instances.
 - The other options are
- ERD View: Clicking this will present the tables in a relationship form.
- Drill Sets: Displays the drill sets present in the drill tables.
- Bulk Joins: Displays the joins present and related operations.
- Migrate Database Connector: Provides the option to migrate the database connector to another database connector.
- Info: Displays the info of the domain.
- Language: Choose between English, German and Chinese language for the application.
- Choose the source on which the domain needs to be created. Sources can be CSV, Excel, XML, Access and Google Spreadsheet.
- Click on Connect to Data icon and select Database option to display the details of the connection and database schema.
- Click the Tables Panel to display the Table/View/Synonyms list and their details like Name, Type, Connection Details etc.
- The lower panel below the tables panel displays Details, Columns, Data and Joins related to the source. For more details see Table Details.
- Click the
 icon to create, edit, delete and export the domain and global LOVs.