System Settings
System settings is where the administrator sets up the delimiter CSV information, temp path and the number of passwords attempts a user can try to login before being locked out.
- To modify setting values, click on the for system settings edit.
- Once changes have been made, click Save.
3. A success message Global Settings updated successfully is displayed. Click Dismiss to close the dialog box. The administrator will be navigated back to the global settings page.
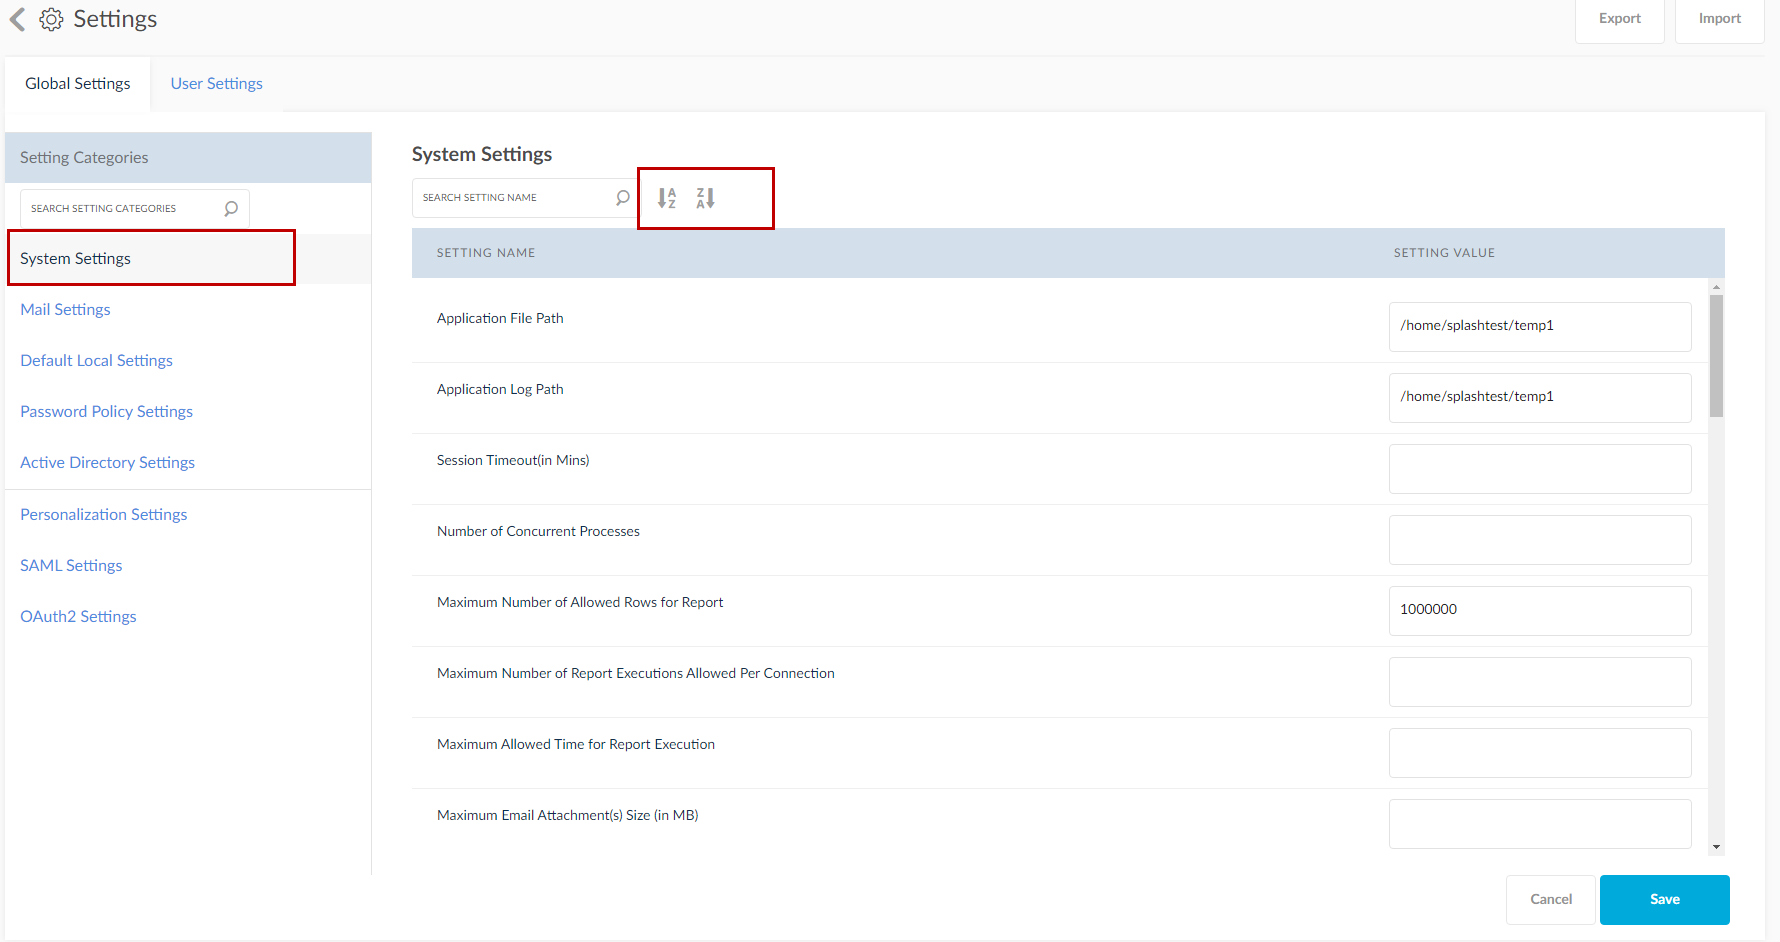
System Settings
- Delimiter CSV: Enter the character the user would like to use as the Delimiter for CSV file Output.
- Application File Path: The path entered for this setting will be used to store the outputs of all the submitted requests as well as any flat files used to load data into SplashBI for reporting. This path is also used in various other SplashBI functions where a temporary location is needed to store files.
- Maximum Allowed Rows: Maximum Allowed Rows returned from a report submission. When a report execution reaches this limit, the report will automatically terminate.
- Auto Drilldown Count: Do not create the CSV file when the drilldown row count exceeds this specified value.
- Maximum Allowed Time (in Minutes): This profile will set a maximum allowed run time for report execution; protecting the system from reports that may never end. There is no default value for Maximum allowed time.
- Number of Tables to Expand: This will set a specified number of tables allowed to be expanded on the report create/edit screen. There is no upper limit.
- Max Connection Processes Allowed: This setting will restrict the number of processes a connection can have executing at a single point in time.
- Number of Concurrent Processes: Number of concurrent processes to be allowed for report submission. Changing this setting requires the server to be restarted to take effect.
- Validate EBS Responsibilities: If this is set to Yes, SplashBI will use eBusiness Suite responsibility security to control access to module data.
- Session Timeout :The duration of inactive time in minutes before users are automatically disconnected. If a value is not provided, or is less than 1, 30 minutes becomes the default.
- Maximum Email Attachment(s) Size (in MB): Set the maximum file size allowed for email attachments to be equal, or less than, the same configuration setting of the organization's email system.
- Excel Output Threshold Value (in MB): Threshold file size limit for a CSV report. If the threshold value limit is exceeded, an Excel output will be generated instead of CSV.
- Enable Multi Language: Turning this setting to ON will enable multi-language capability.
- Debug Mode: The Debug setting should normally be OFF in production. When Debug is ON, system log files are captured and can quickly take up space.
- Application Log Path: All log files will be stored within this directory.
- Set Report Column NULL Value As: Replace the display of NULL values found within reports with this specified text.
- Create Report Set during Discoverer Migration: This setting will allow the user to create a report set during Discoverer Migration process.
- Allow Changes to Default Admin User: This setting gives the default admin the rights to make configuration changes.
- Number of tables to show popup for driving table selection: Enter the number of tables.
- Enable SAML Global Logout: Enable this to logout off all the SAML logged in accounts.
- Logout URL: Enter the target URL to be re-directed to after logging out.
- CSRF Token Age : Enter the CSRF token age. CSRF (sometimes pronounced sea-surf) or XSRF, is a type of malicious exploit of a website where unauthorized commands are transmitted from a user that the web application trusts.
- Display Off: Enter the default text to be substituted when there is no content from the execution of a report. This message is shown if the user doesn't have configured report/chart/ domains/favorites tab.
- Chart Data Plot Colors: Enter the chart data colors in hexa form.
- Application URL: Enter the application URL.
- Instance Name: Enter the instance name that will visible in the login page.
- Connectors Thread Count: Mention the thread count to connectors for simultaneous processing.
- Number of days to retain Oracle Cloud Logs: Mention the number of days for the Oracle Cloud logs to be in the application files.
- Allow Default Self LOV: This setting is used to restrict List of values of a filter from configuring full table column data on which filter is being created upon. Setting it to No will not allow the filter to display the complete data.
- Enable Query Caching: This enables the system to cache query details to run the report with similar data faster.
- Context Path: Change the context path to their organization standards, the default is SplashBI.
- Is Load Balancer Enabled: Select between Yes/No. Load Balancer allows you to run SplashBI on two servers.
- Load Balancer Server Protocol: Select between HTTP/HTTPS. (S) stands for secure.
- Load Balancer Server Name (Host): If the load balancer is set to Yes, then you can enter the host name.
- Load Balancer Server Port: If the load balance is set to Yes, then you can enter the port name. Port name is the number of the server.
- Encrypt Data At Rest: Set this to Yes to encrypted static data.
- User Activation Code Expiry Duration (in mins): Based on this setting user activation link will be expired, by default setting value is 1440 which is equal to one day.

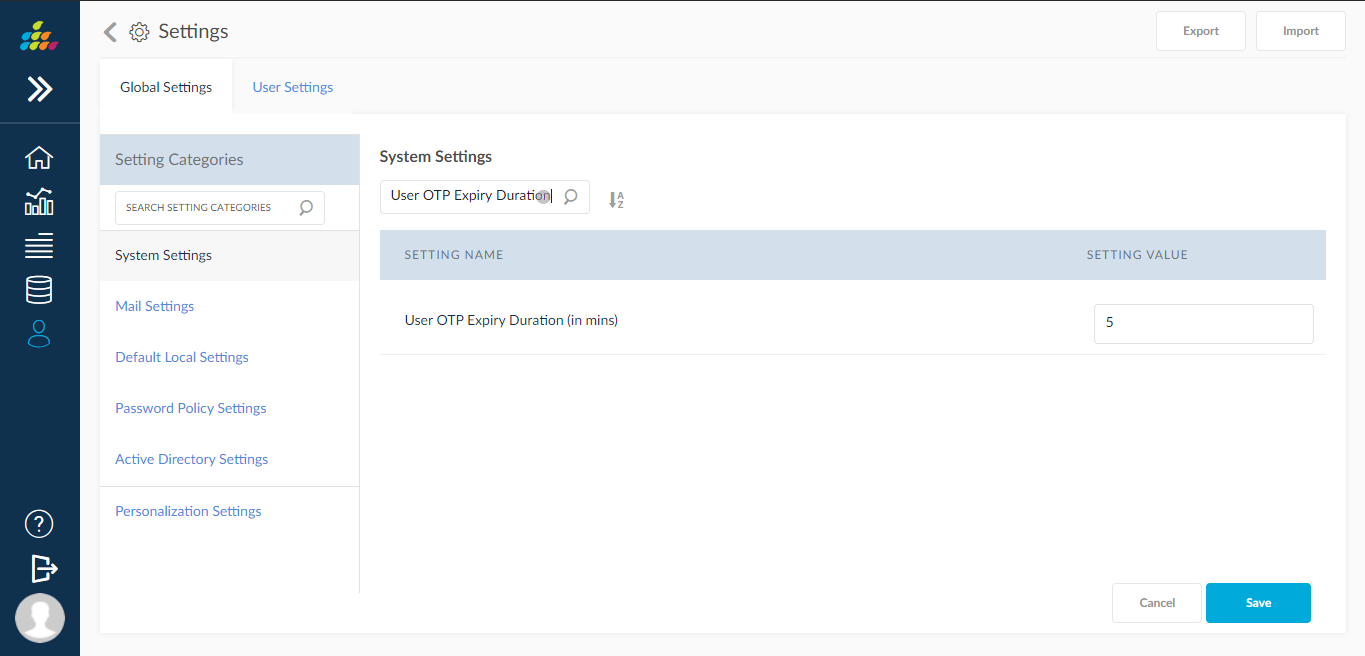
- User OTP Expiry Duration (in mins): Based on this settings value user OTP will expired, default value is 5, we can increase/ decrease value based on our requirement
Captcha
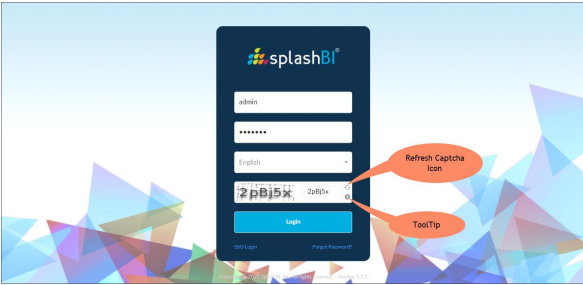
SplashBI supports implementation of a captcha feature during login, change password and forgot password areas for the user to provide better security and be safe from internet hacks for login. Especially useful in SAAS environment.
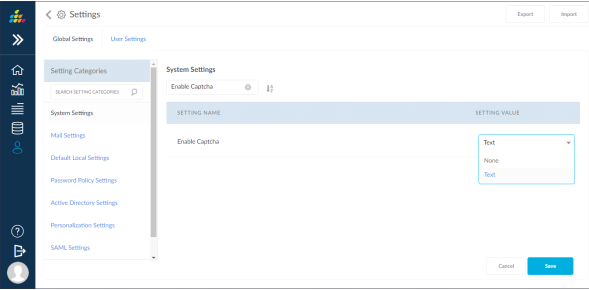
Enable Captcha: If this setting is set to TEXT then captcha validation is mandatory at the time of login else select NONE to skip the captcha validation.
When this setting is set to TEXT then captcha login screen validation looks like below one and validation will be on Login screen, update password, forgot password & reset password screen and refresh icon is given to reload the captcha image in case of existing one is not appropriate.