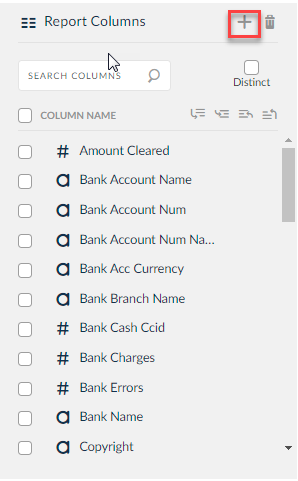
Report Columns
Once the correct domain is selected the domains windows is populated with tables of that specific domain. To access specific data points, click EXPAND ALL and COLLAPSE ALL icons to expand and collapse tables respectively. To add columns to the report, either drag & drop into the Report Columns window or select multiple by checking the boxes to the left and use the ![]() icon.
icon.
As you add tables to the Report Columns, the Properties menu will be displayed on the Configuration screen specific to that particular column. Select, navigate among the columns by clicking the ![]()
icon.
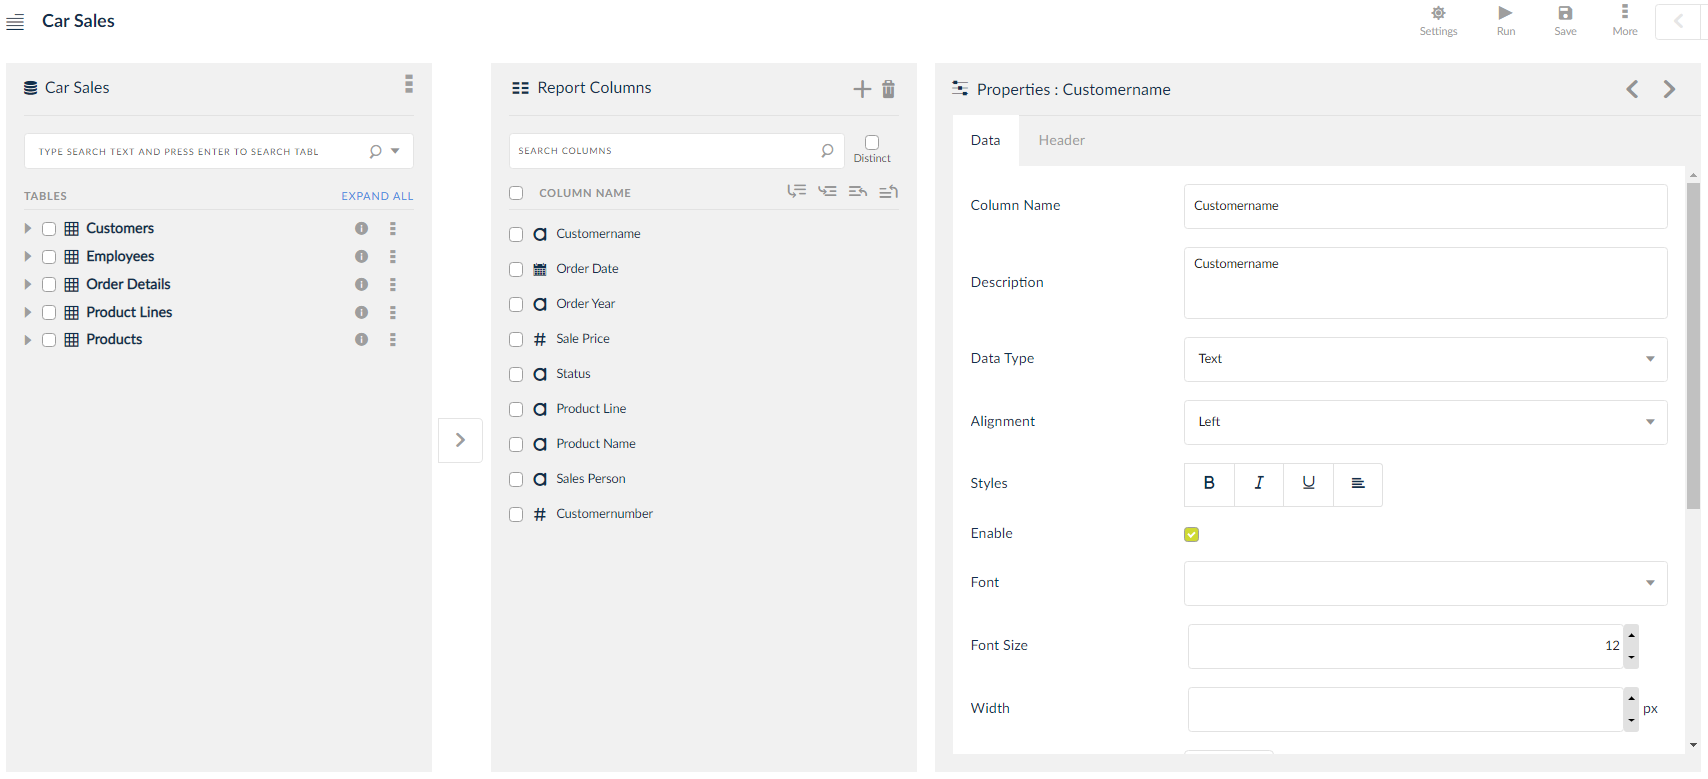
The properties menu presents options to customize the appearance of headers and data on the report output. The available customizations are going to enhance the look and feel of the report, however any property left unchanged will be taken as default to the user's system preferences. The properties that are available for customization are:
- Column Name: Customize the name of the column; SplashBI will default to column name as shown inside of the table.
- Description: Provide details regarding the data; also enables a tool tip that displays the description when hovered over the column name.
- Data Type: Choose between text/number/date.
- Alignment: Adjust the text justification inside of the report cells.
- Style(s): Choose between bold/italic/underline and wrap text.
- Font: Select specific font style for specific column.
- Font Size: Select a particular font size.
- Font Color: Select a brand complaint font color.
- Background Color: Highlight the color for specific column.
- Source Columns: Displays the source column name.
- Table Name: Displays the Table Name.
- Replace Null Value With: Enter the null value replacement value. Null values in the column data will be replaced with the text entered in this field.
- Exclude in Select: Check this option to enable exclude in select option.
Header Tab

Custom Calculations
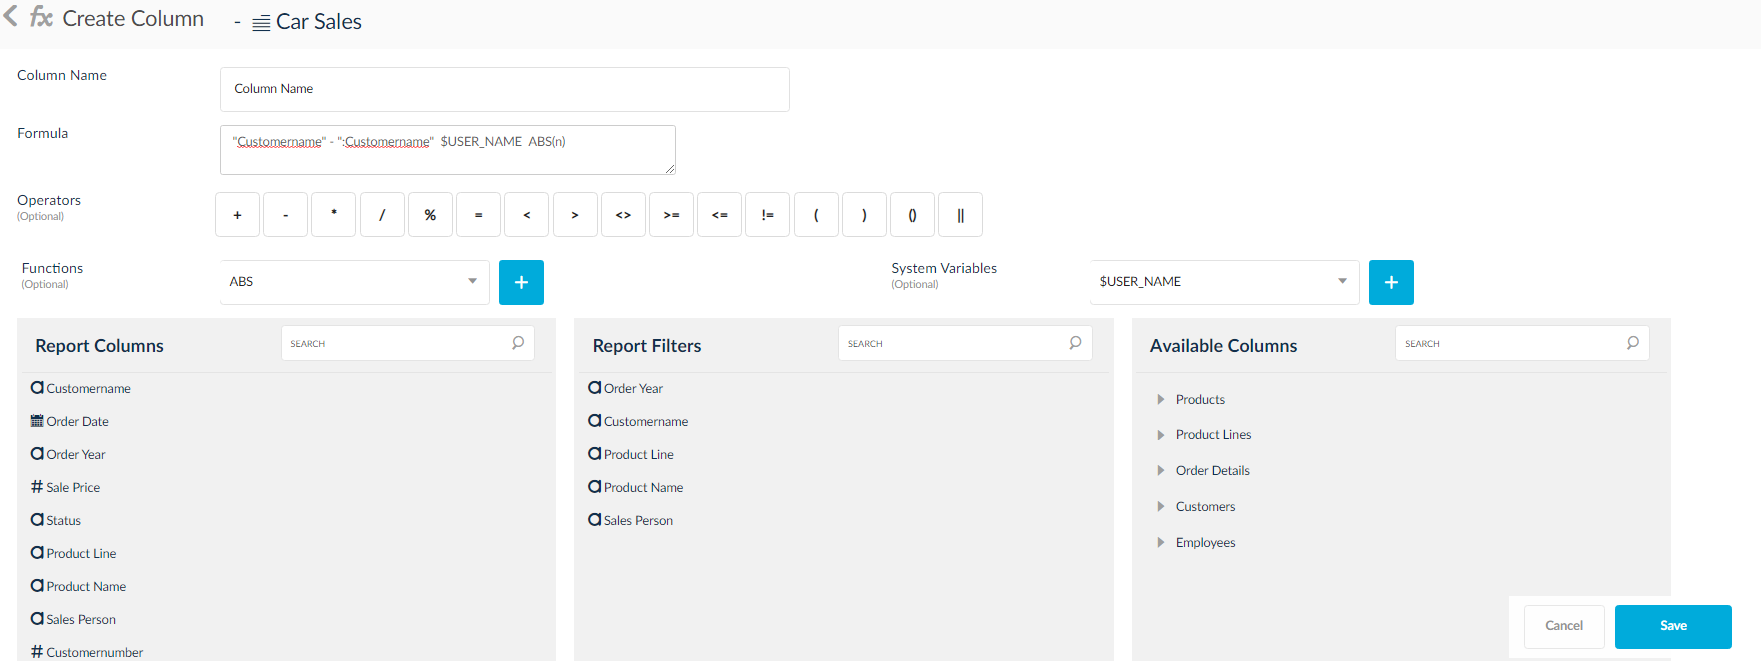
- Click the highlighted icon to create custom calculations that will be built into the report.
2. In the pop up window mention the formula with a variety of pre-programmed operators. All columns and parameters that have already been added to the report will be available to create custom calculations. Use other tables from the same domain to add to the complexity of the calculation.
3. Click OK.
4. Once the creation of columns and properties are completed, click Save.