Report Filters
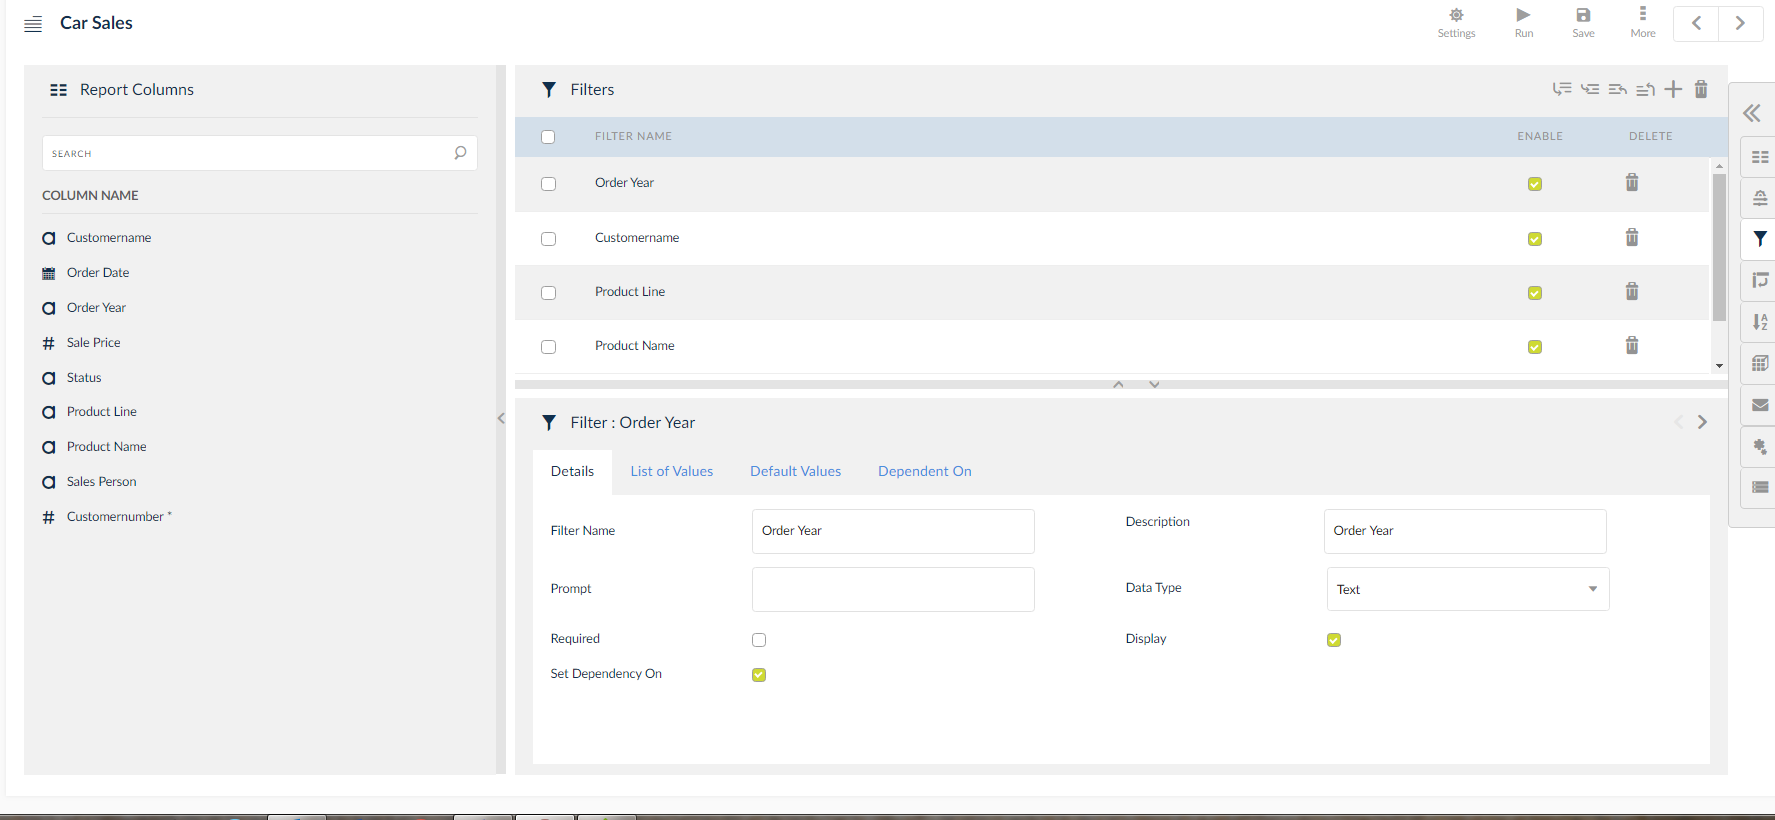
Click the funnel icon to enter the filters screen. Drag & drop report columns to create filters for specific columns. Any enabled filters in the previous screen will be enabled as a filter in the Report Filters screen. There are four tabs in this window:
- Details
- List of Values
- Default Values
- Dependent On
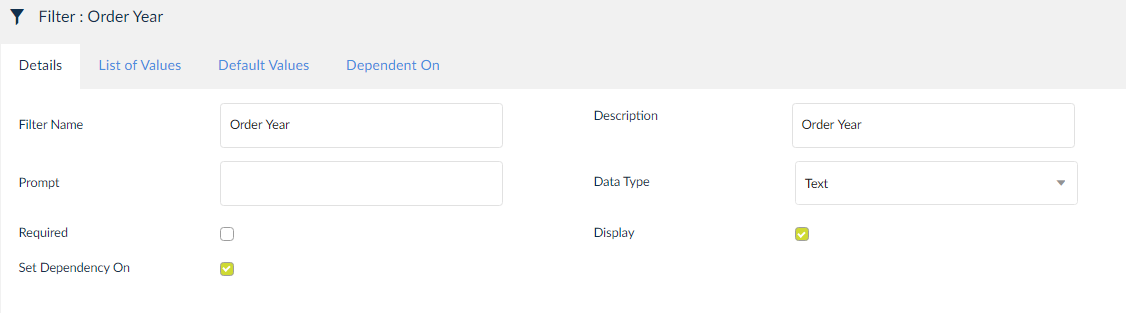
Details Tab
Make edits to filter name and description, as well as other functionality options. Determine the usability and visibility of a filter. Check the Set Dependency On check box to view the Dependent On tab.
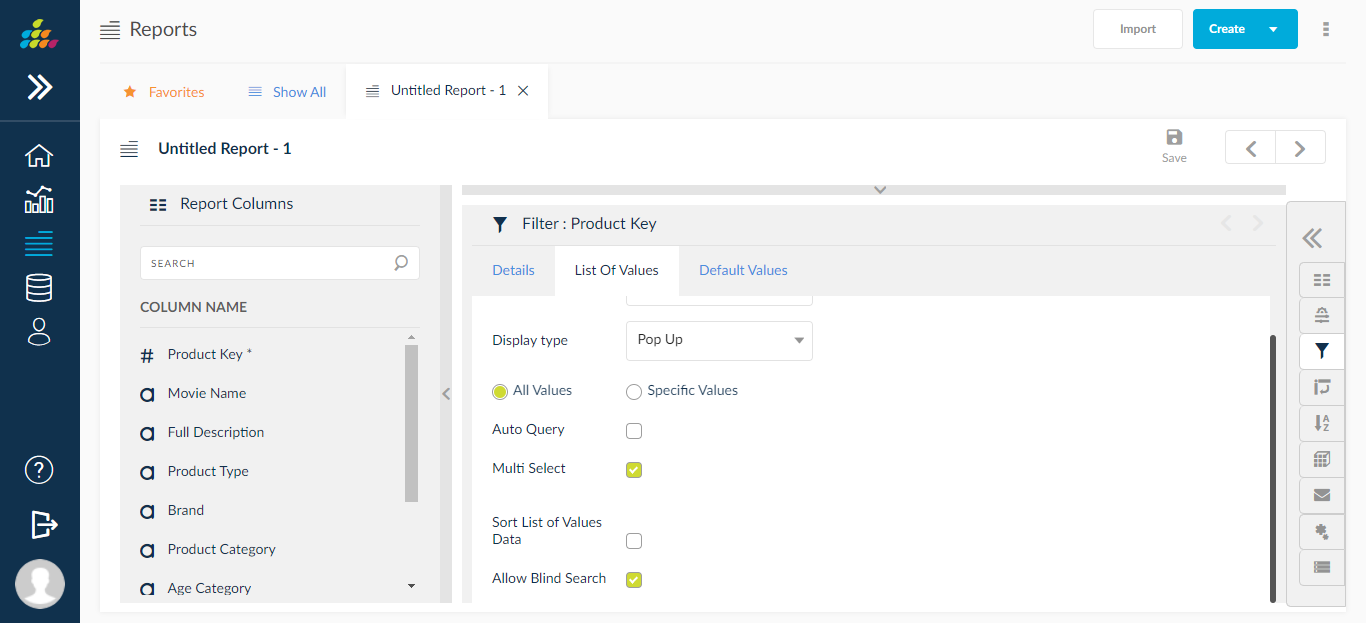
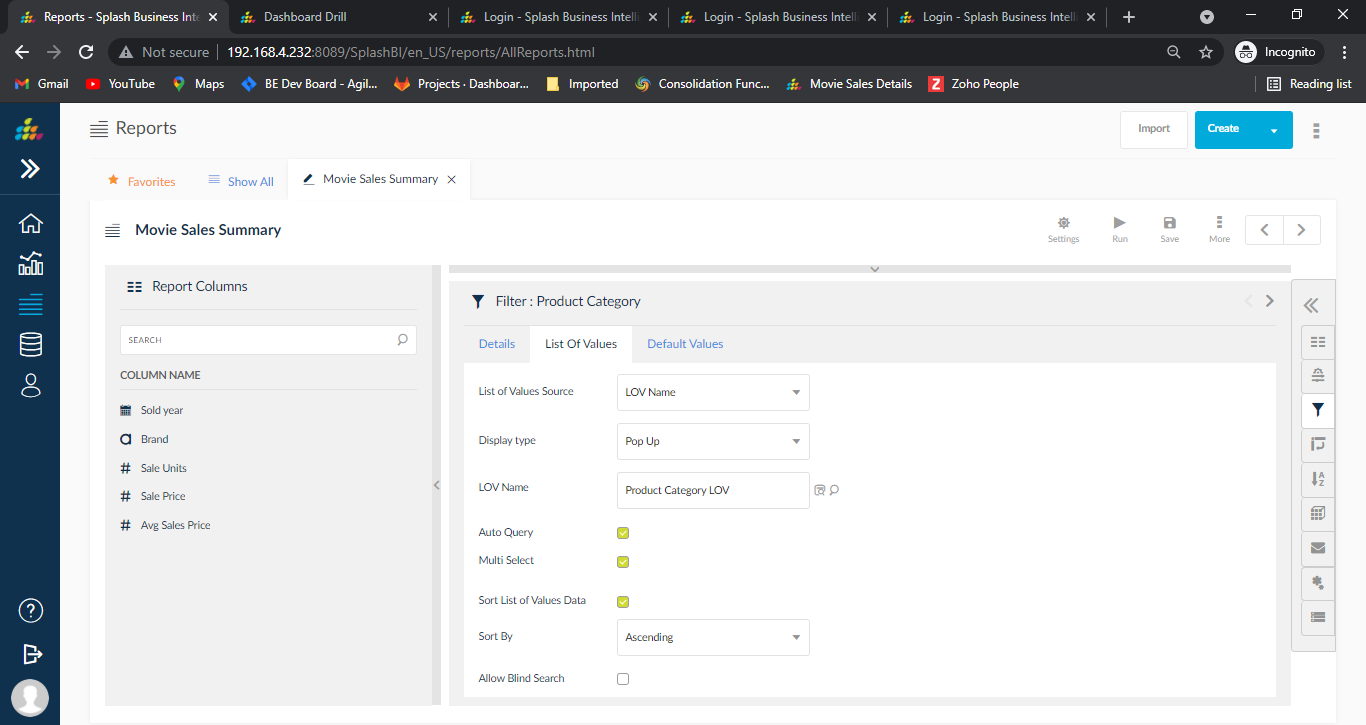
List of Values Tab
- Choose the display style of the filter values in the report page.
- From the drop down select the Display Type, List of Values Source and Connection.

List of Values Sources
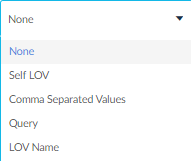
- None: None option in drop down.
- Self LOV: filter will display all the data.
- Comma Separated Values (CSV): When selected, a text box will appear to enter the values in comma separated format. The values entered in this field will appear as list of values for the filter in the report submission screen.
- Query: When selected, a text box will take SQL query as input. Query can be copied by clicking on copy to clipboard icon. The output of the SQL query entered in the text box will appear as list of values for the filter on the report submission screen.
- LOV Name: Select a specific pre-defined LOV to use. Click
 to display the queries. On clicking the
  icon query related to that LOV is displayed. These LOVs can be defined under the Domains section.
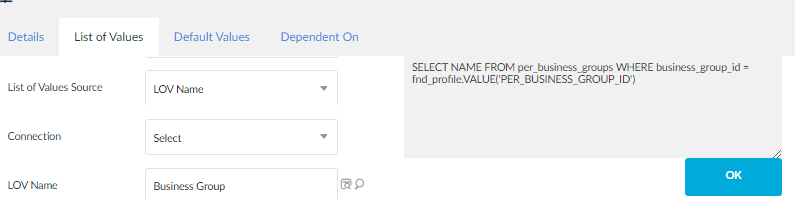
- All Values is selected as the default option. This option will show all the possible values in the selected LOV as the list for the filters. To view only specific values as the LOV, choose Specific Values as the option.
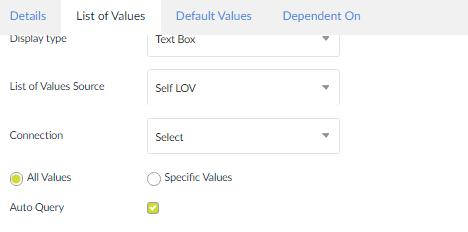
NOTE: Auto query check-box can be selected to have the list automatically loaded on the report submission screen without the need to manually search for values.
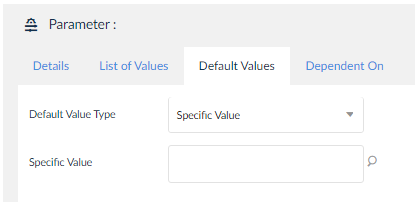
Default Values Tab
Under the Default Values tab, define the Default value type of the report filter. Below are the different default Value Types.
- Specific Value: Enter the specific default values for the filter. A new window opens to select the value from a search field.
- Query: This option will allow the default value to be populated based on the output of the SQL query entered. The text area will appear to allow user to input SQL query.
- System Variable: This is to specify that default value for the filter is derived from the chosen system variable. Choose value from the drop-down which will be replaced by a value at run time.
- Current Date: The System date is displayed as the default value for the filter in submit page when current date is chosen as default value type.
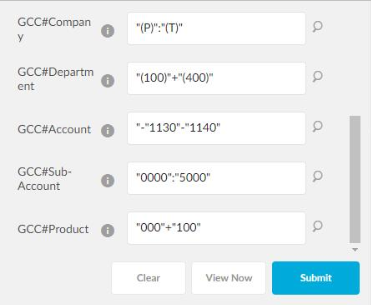
- In LOV Name if display type is pop up then in domain level if we select range include exclude check box then in reports filter section user can able to see exclude include buttons as shown in below screen shot.
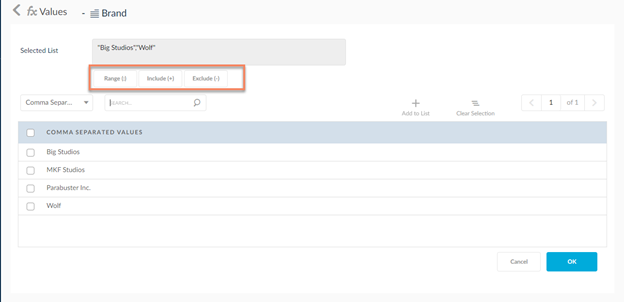
":" represents Range
"+" means include
"-" means exclude
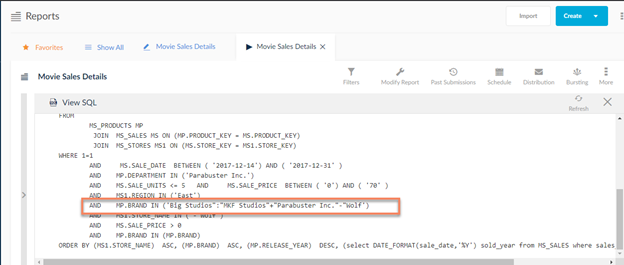
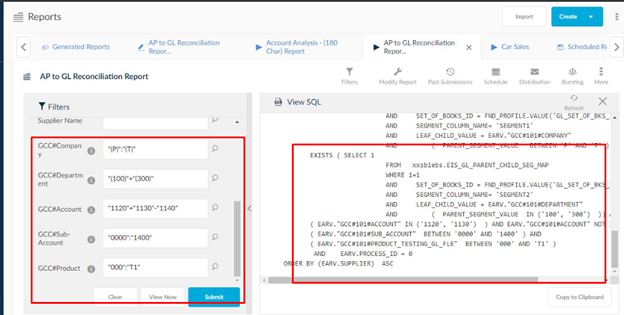
In view SQL Range,exclude,include will form as shown in below image
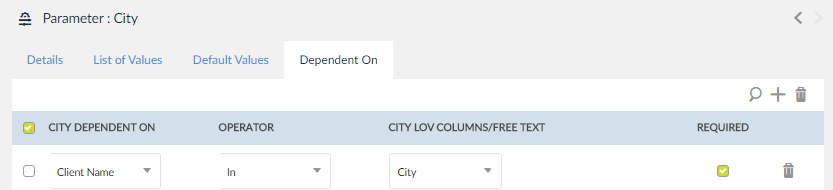
Dependent On Tab
- Click the
 icon to add a dependency condition that you would like to create. Drop downs will be displayed to select the Dependent On variable, the operator and the LOV Columns.
Here, the values in the LOV can only be entered when the Dependent On value is selected. For example, the values of product line can only be selected if the Order Year is selected. - Click the
 icon to view the query that is created based on the dependency condition.
 - Click the
 icon to delete the dependency.
NOTE: Drag and drop the column in the filter panel to display the filters.
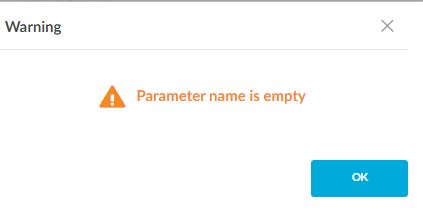
The following error message is received if attempted to fill the product line field without selecting the product name field while submitting the report.
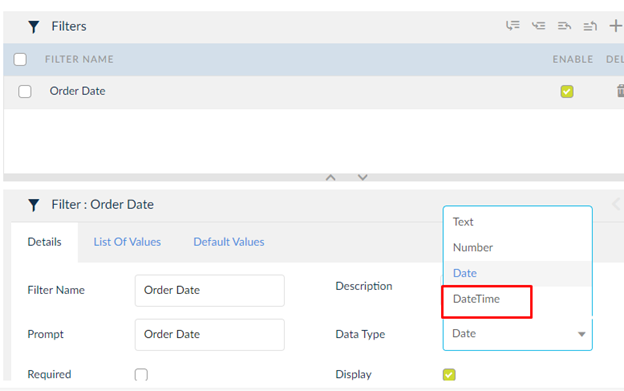
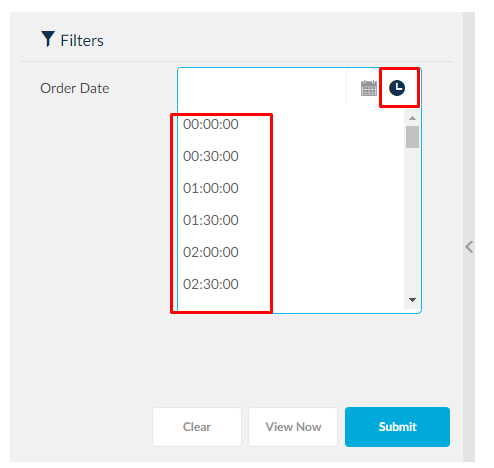
DateTime Filter
SplashBI allows users to create date values as filters but if the time format is not considered for filters. It will be truncated and shown. With this enhancement the transactional data and time is essential for filtering the data between hours and minutes. Giving a new data type only in filters section as "Date time”.
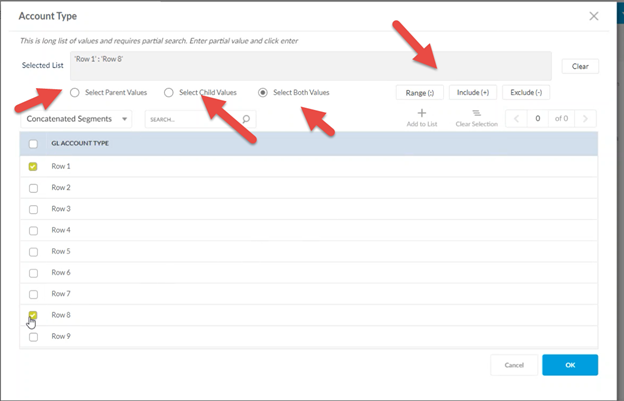
GL Segment LOV Parent and Child
Current system does not have facility to select GL Segments based on Parent Child hierarchy of GL .This feature will provide ability to select Range of values, Include/Exclude functionality for parent child values and feasibility for user to select parent child values for GL segments .
Parent & child GL segment values need to based on selection as shown below screen shot.
Syntax on Run Page
For Child and Both Values:
Parameter Value |
Meaning |
Comments |
"1":"5" |
BETWEEN '1' AND '5' |
":" represents between |
"1" |
IN ('1') |
No symbol at start means include |
"1"+"3":"10" |
IN ('1') OR BETWEEN '3' AND '10' |
"+" means include |
"1"-"3":"10" |
IN ('1') AND NOT BETWEEN '3' AND '10' |
"-" means exclude |
"1"+"3":"10"-"6" |
(IN ('1') OR BETWEEN '3' AND '10') AND NOT IN ('6') |
combination of all of them |
"-"6"+"3":"10" |
BETWEEN '3' AND '10' AND NOT IN ('6') |
Special case if we want the first one itself as NOT IN. In this case append "- |
"-"6" |
NOT IN ('6') |
Special case if we want the first one itself as NOT IN. In this case append "- |
For Parent value
Parameter Value |
Meaning |
Comments |
"(1)":"(5)" |
BETWEEN '1' AND '5' |
":" represents between |
"(1)" |
IN ('1') |
No symbol at start means include |
"(1)"+"(3)":"(10)" |
IN ('1') OR BETWEEN '3' AND '10' |
"+" means include |
"(1)"-"(3)":"(10)" |
IN ('1') AND NOT BETWEEN '3' AND '10' |
"-" means exclude |
"(1)"+"(3)":"(10)"-"(6)" |
(IN ('1') OR BETWEEN '3' AND '10') AND NOT IN ('6') |
combination of all of them |
"-"(6)"+"(3)":"(10)" |
BETWEEN '3' AND '10' AND NOT IN ('6') |
Special case if we want the first one itself as NOT IN. In this case append "- |
"-"(6)" |
NOT IN ('6') |
Special case if we want the first one itself as NOT IN. In this case append "- |
Restrict Blind Search
There can be latency for downloading huge data from real-time environments like OC cloud and sales force in the future and in such scenarios, we can provide an option to report the developer to allow blind query for the configured LOV.
Auto Query is the check box available in report filter level and domain LOV level. When Auto Query is OFF and the pop up is clicked, then LOV data will not be loaded. However, clicking on entering in search field without any search text is considered as the blind query and retrieves all LOV data. At this point, there can be too much performance issue if the data is huge and traveling through the cloud network is added overhead.
If a Domain LOV is configured with this flag, highlight the report level filters field with the value configured in domain LOV level and allow user to modify this level.
Show the new field in report filters of all LOV source types.
when this LOV is used in report filter then during run time of all the 3 objects, when the pop up is opened, show another info text on the top of the LOV along with current text in next line as Blind Search is not allowed for this List of Values.
Search Text field will act as mandatory field. Without search text we need to give warning as current design and with blind search need to give another warning that blind search is not allowed for this LOV.
Restrict Blind search check box in report level
Auto Sort for LOV values
Provide an option in the LOV POPUP to enable alphabetical Order or data source order in run page.
Added a drop down to show whether data should display in ascending or descending order or data source order.
Sort by fields in Report level
If a Domain LOV is configured with this flag, highlighted the report level filters field with the value configured in domain LOV level and allow user to modify this level.
LOV Cache
Ability to cache LOV data so that performance is good while end users are using reports especially cloud based reports. This will work good for other solution based LOV queries also where unnecessary execution is not required and can work with cached data only.